project 1
Avian
sanctuary
Avian
sanctuary
Tmeline
March 2025 – April 2025 (4 weeks)
main material
Ply Wood
Oil Stain
Color Stain
id category
Product Design
Form Exploration
Materials & Process Research
Intro to project
Avian Sanctuary responds to urban expansion by designing human-built structures that provide safe resting and nesting spaces for birds, balancing function, form, and material.


Reference Images: Pinterest
Target Species Research
Hummingbirds
Hummingbirds are small, highly agile birds native to North and South America.
Their compact size and ability to maneuver in tight spaces make them an ideal target species for this project.
-
Quiet, tree-adjacent habitats
Lightweight, cup-shaped nests
-
Primarily nectar-fed
Requires frequent energy intake
-
Capable of hovering and rapid maneuvers
Attracted to small water sources and droplets
-
Seasonal migration across the Americas
Requires stable resting spots
Design Implications
Small body size → Compact shelter design
Agile flight → Clear approach paths
Lightweight nests → Soft interior materials
Migratory behavior → Modular installation

Inspiration by…


GEOMETRIC STRUCTURE
Exploring simple geometric forms and thin-material structures to inspire clean, functional shapes.

EXISTING PRODUCT
Reviewing existing birdhouses to understand practical construction, accessibility, and user-friendly forms.
ExPLORATION
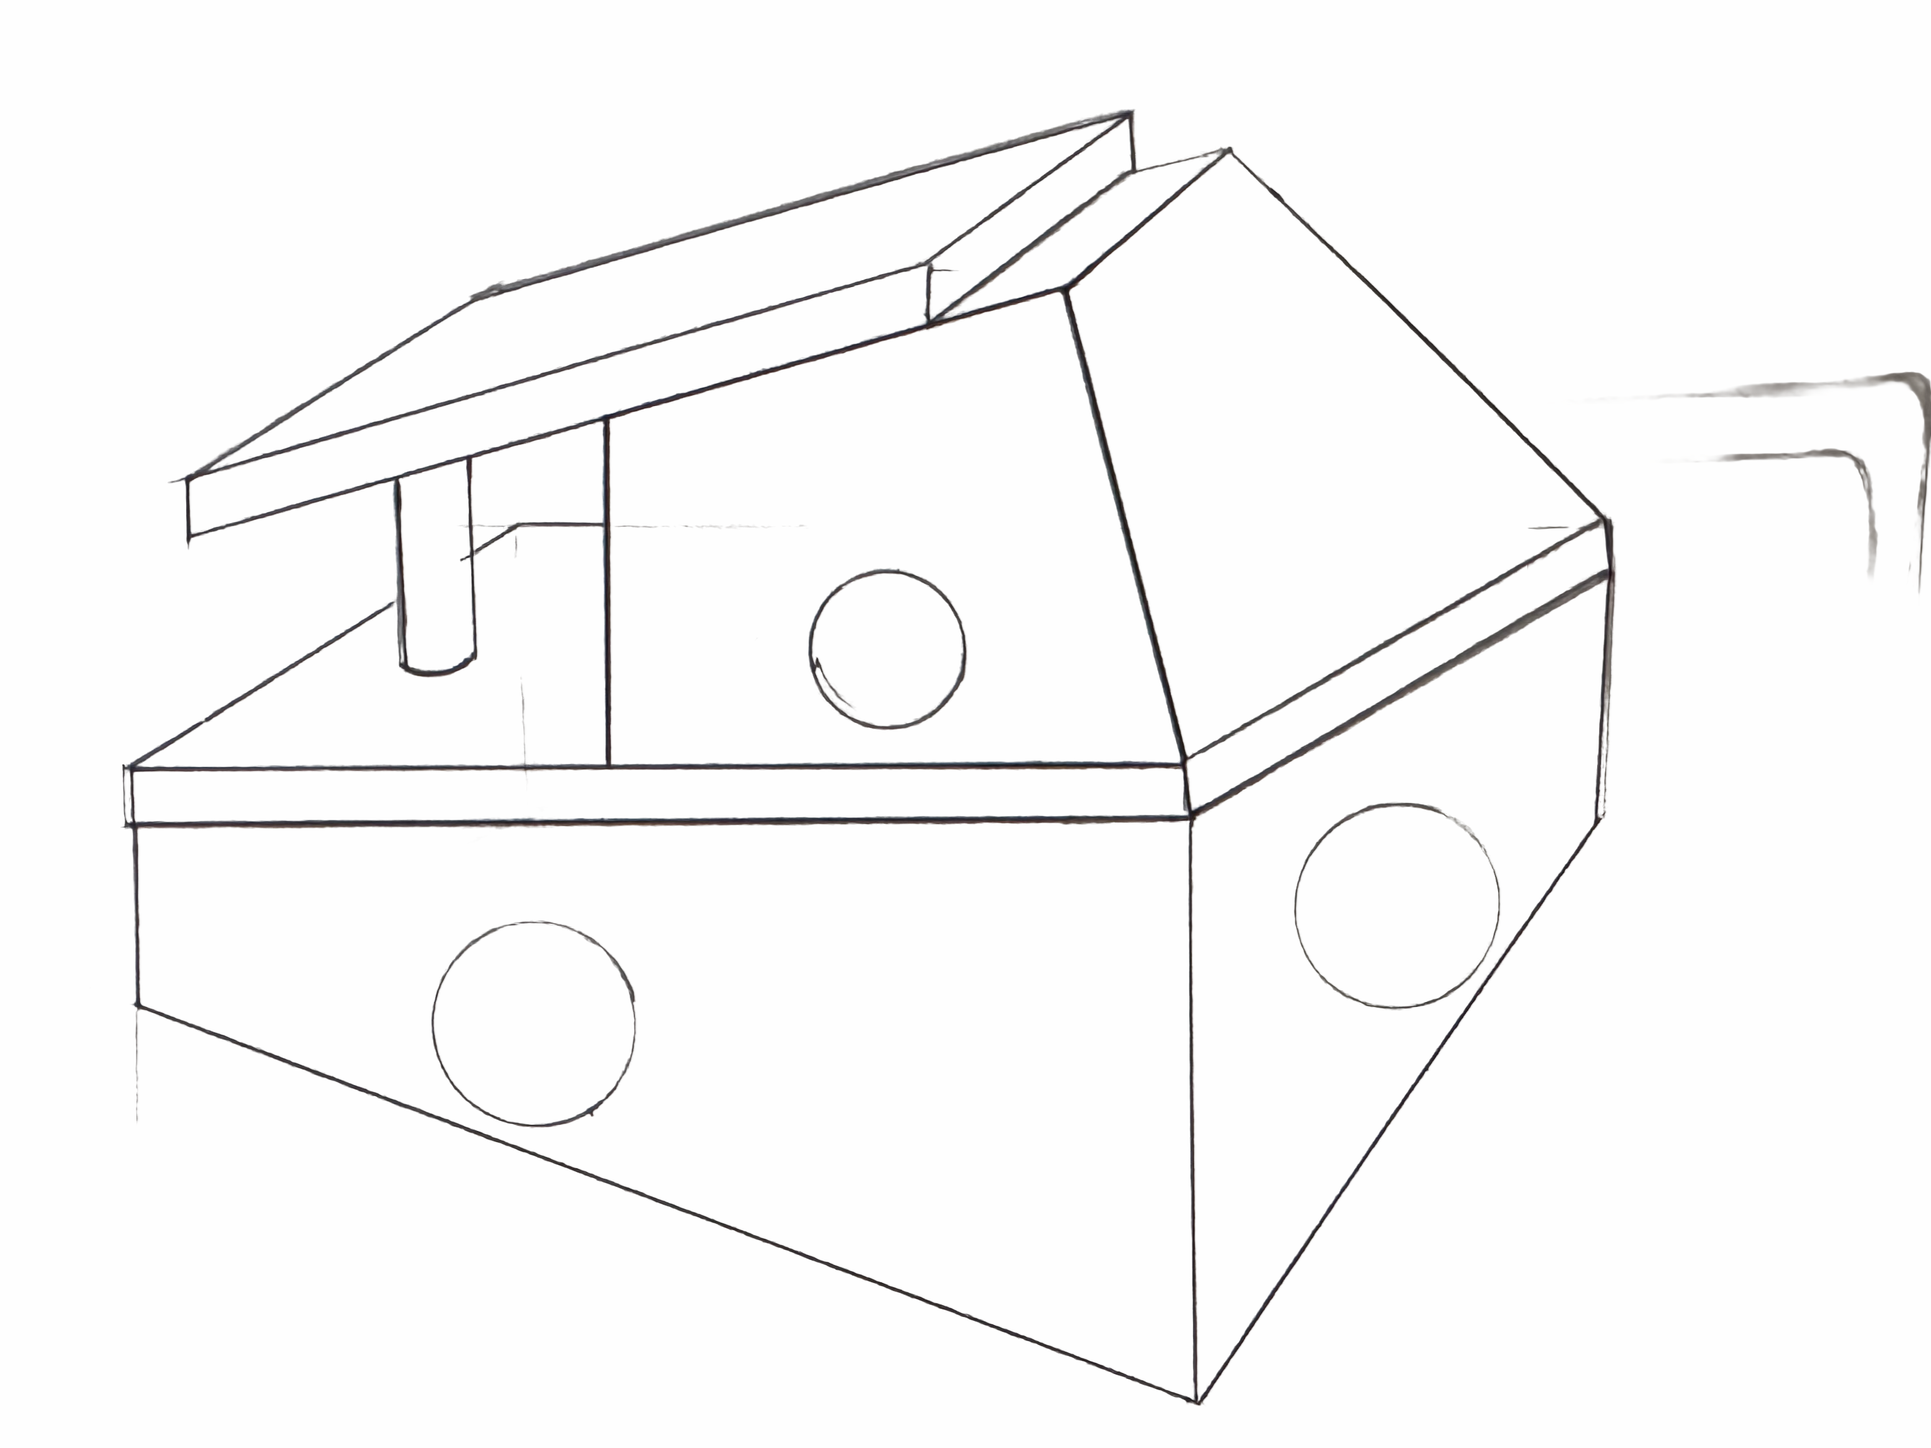
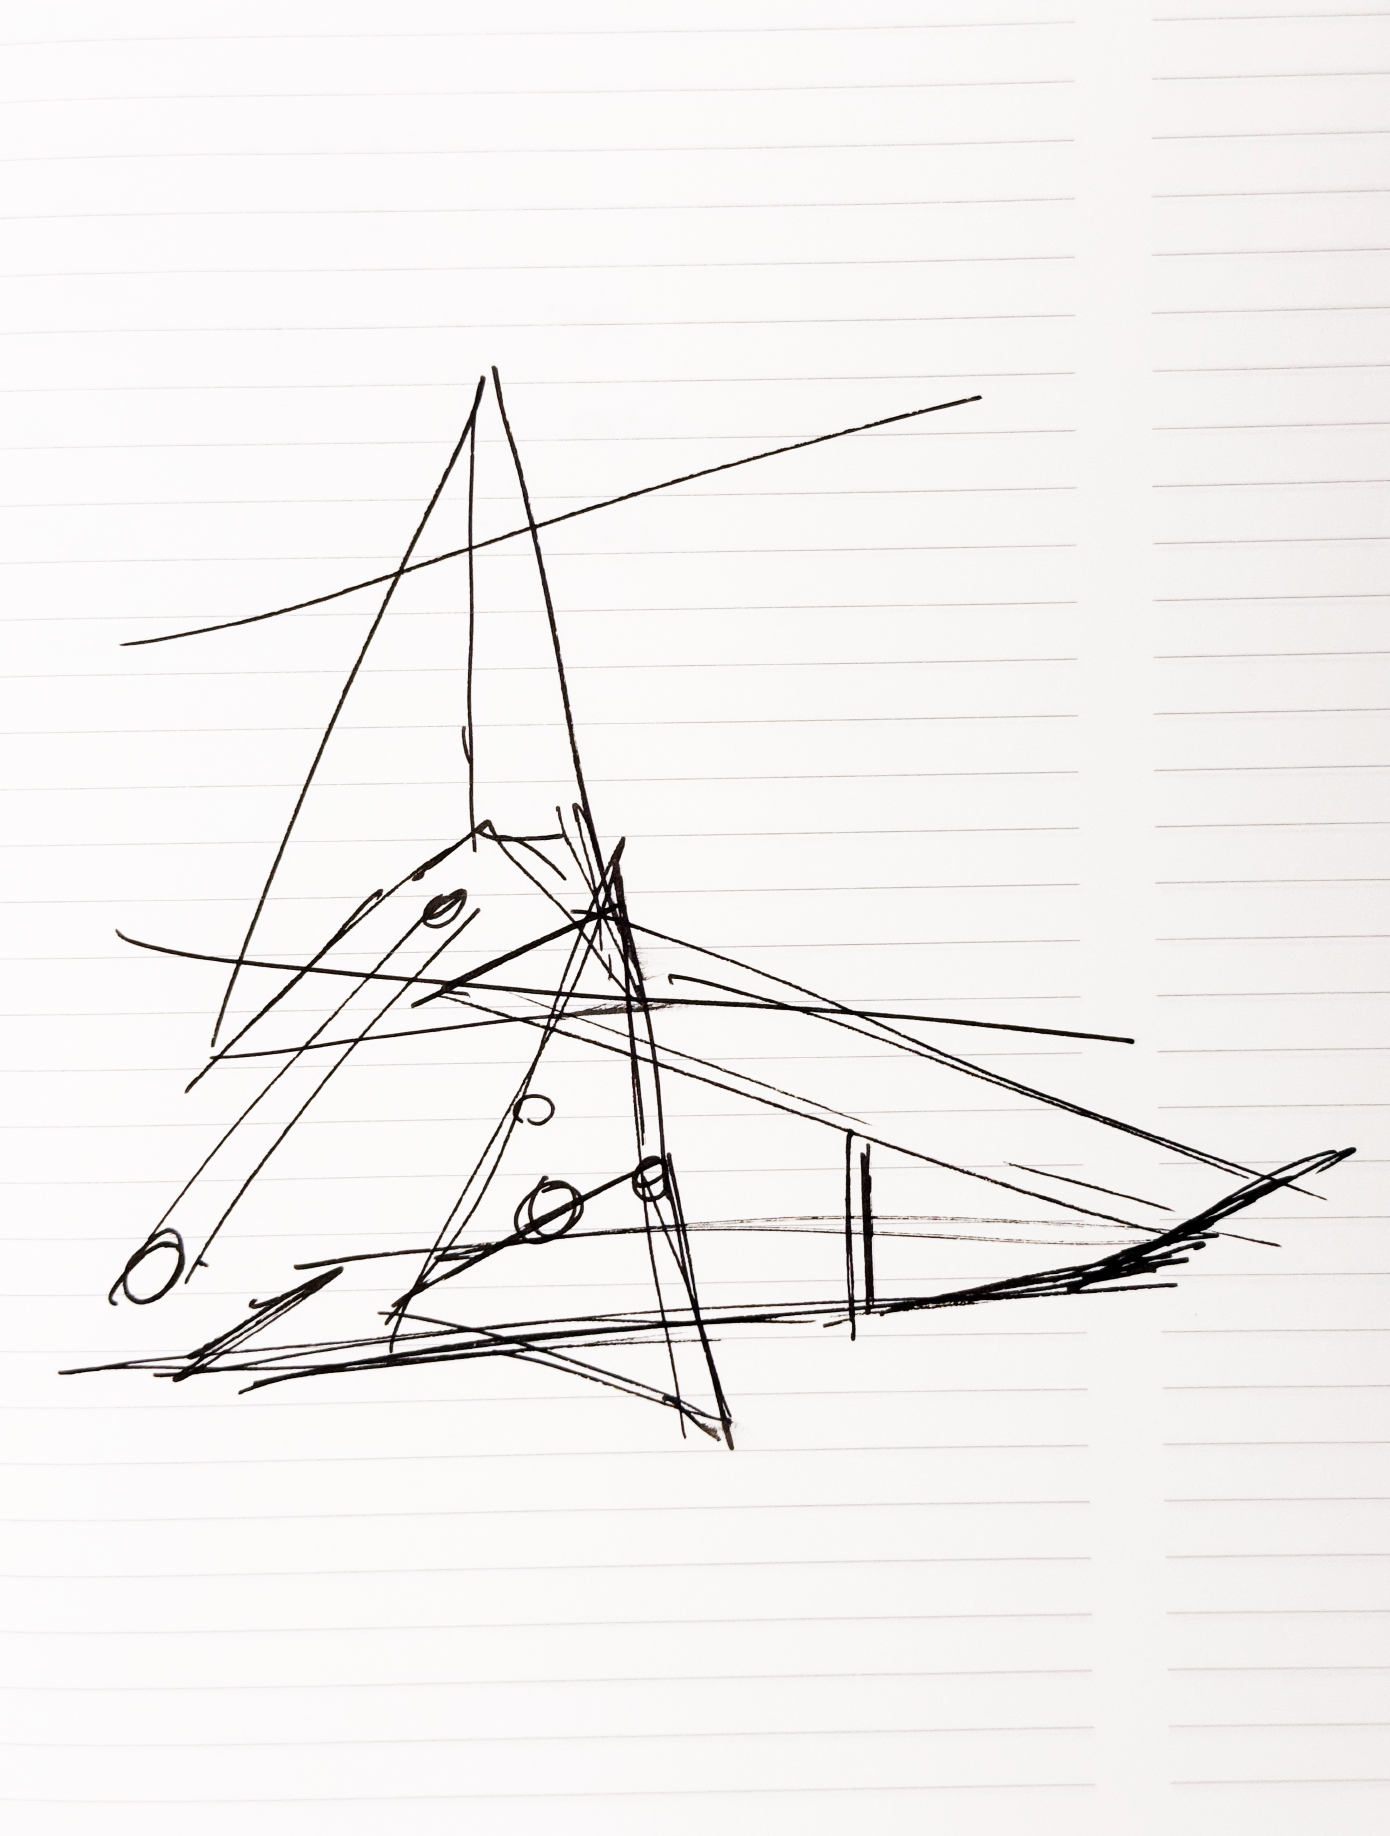
Rough sketching helped define the foundational structure, with intuitive sketches using lines and geometric shapes to capture early form concepts.
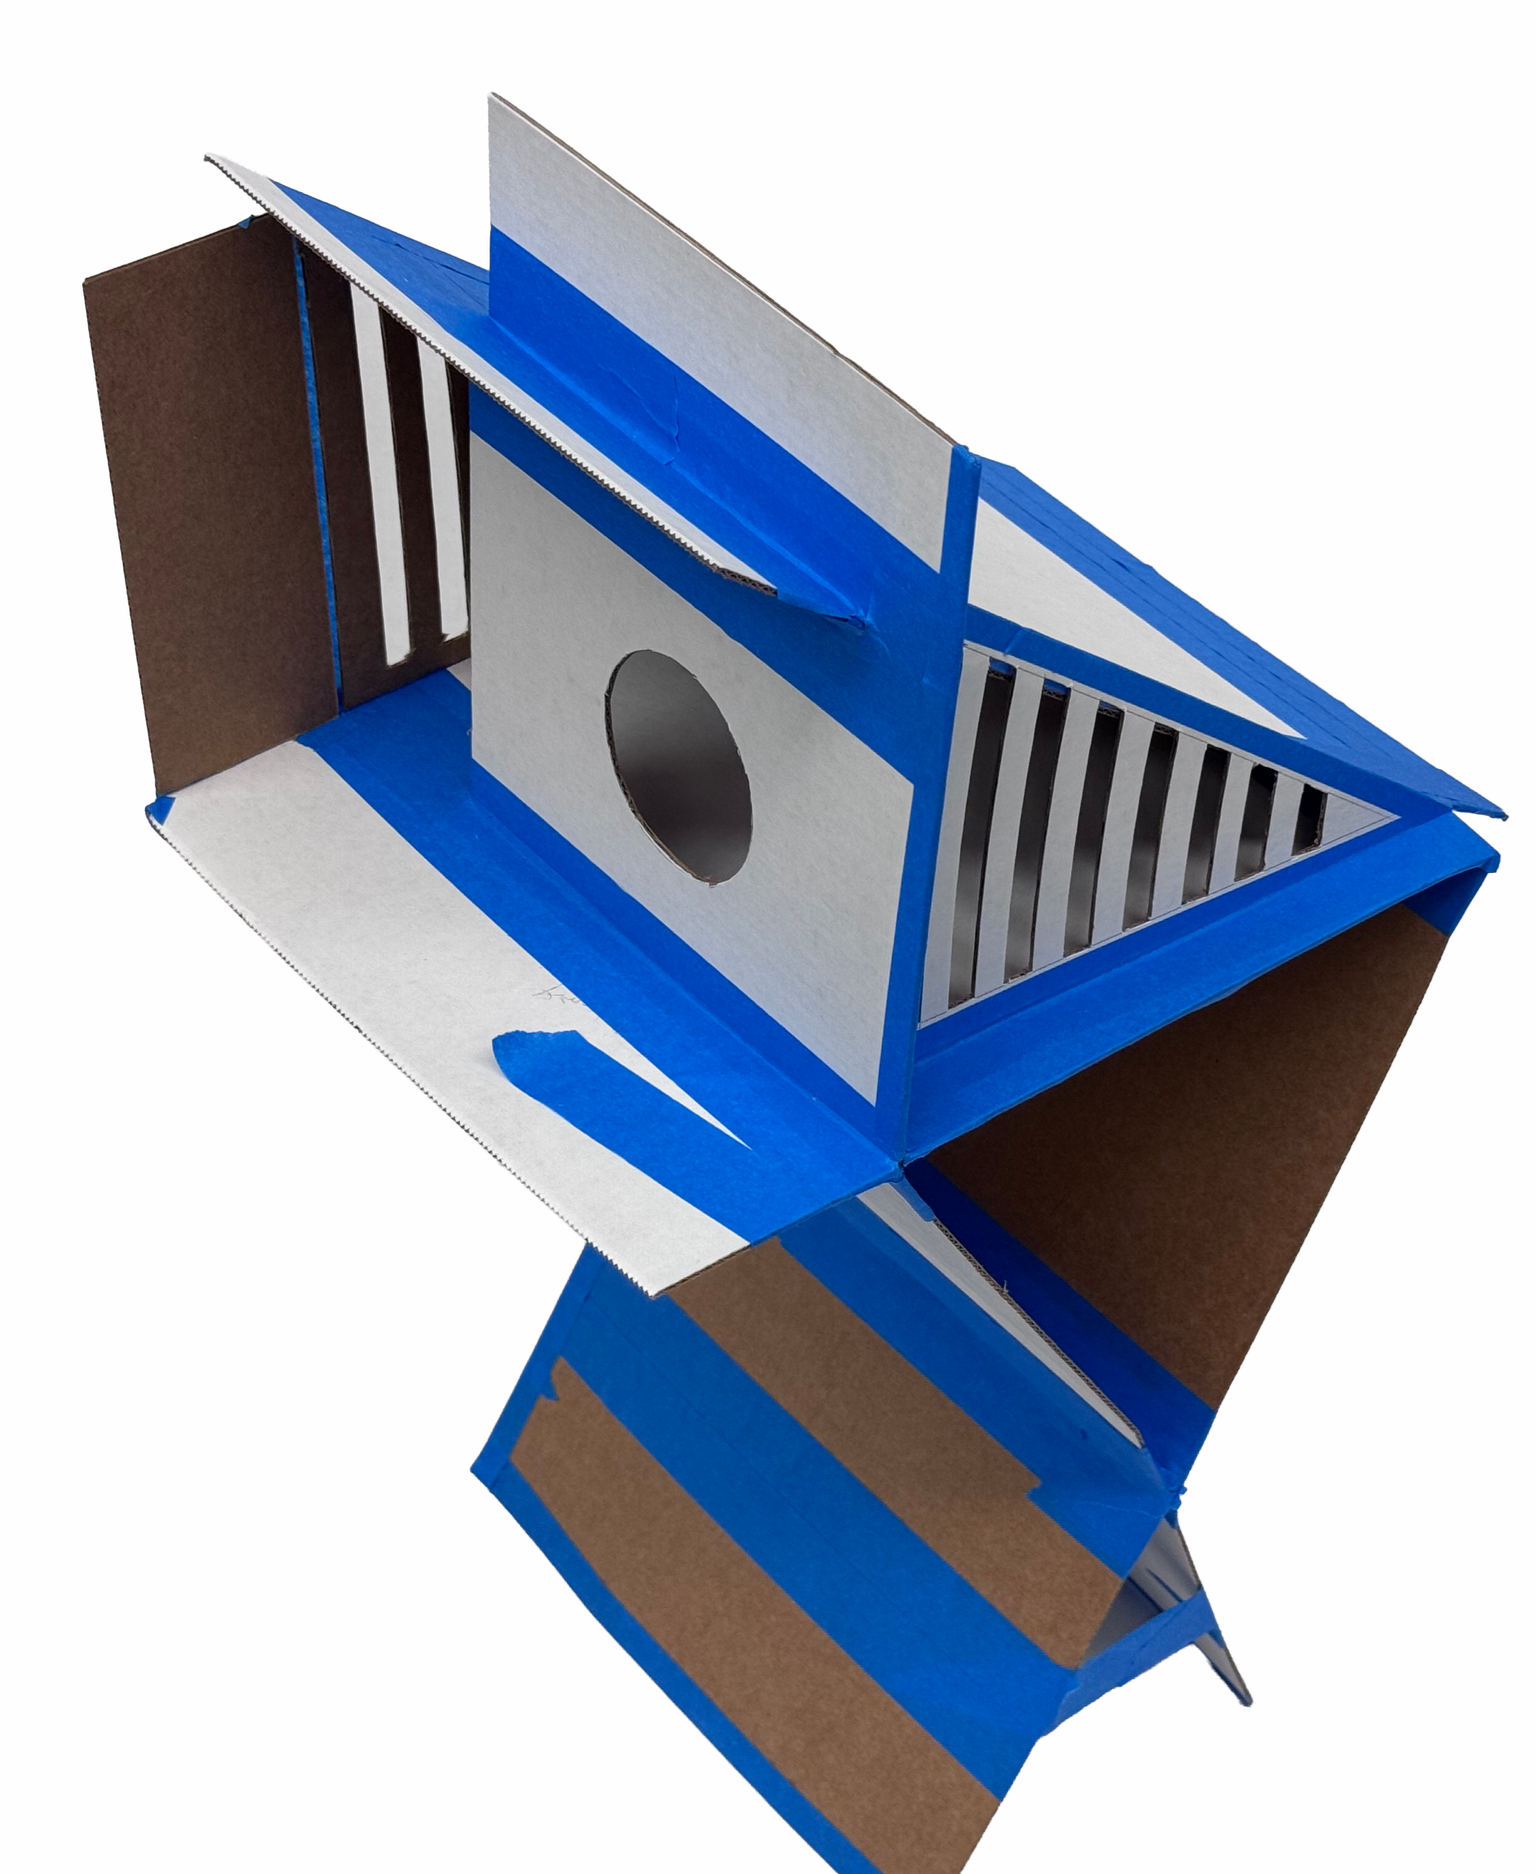
Modelmaking
Sketches were translated into cardboard models to explore geometric forms in three dimensions, identifying shapes suitable for hummingbird nesting..
rendering
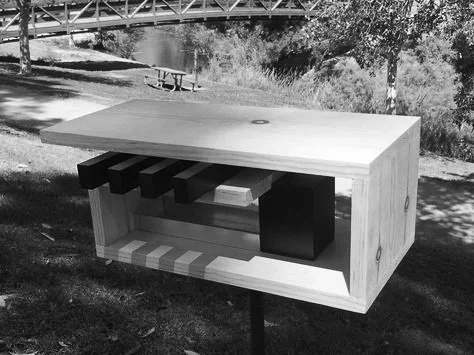
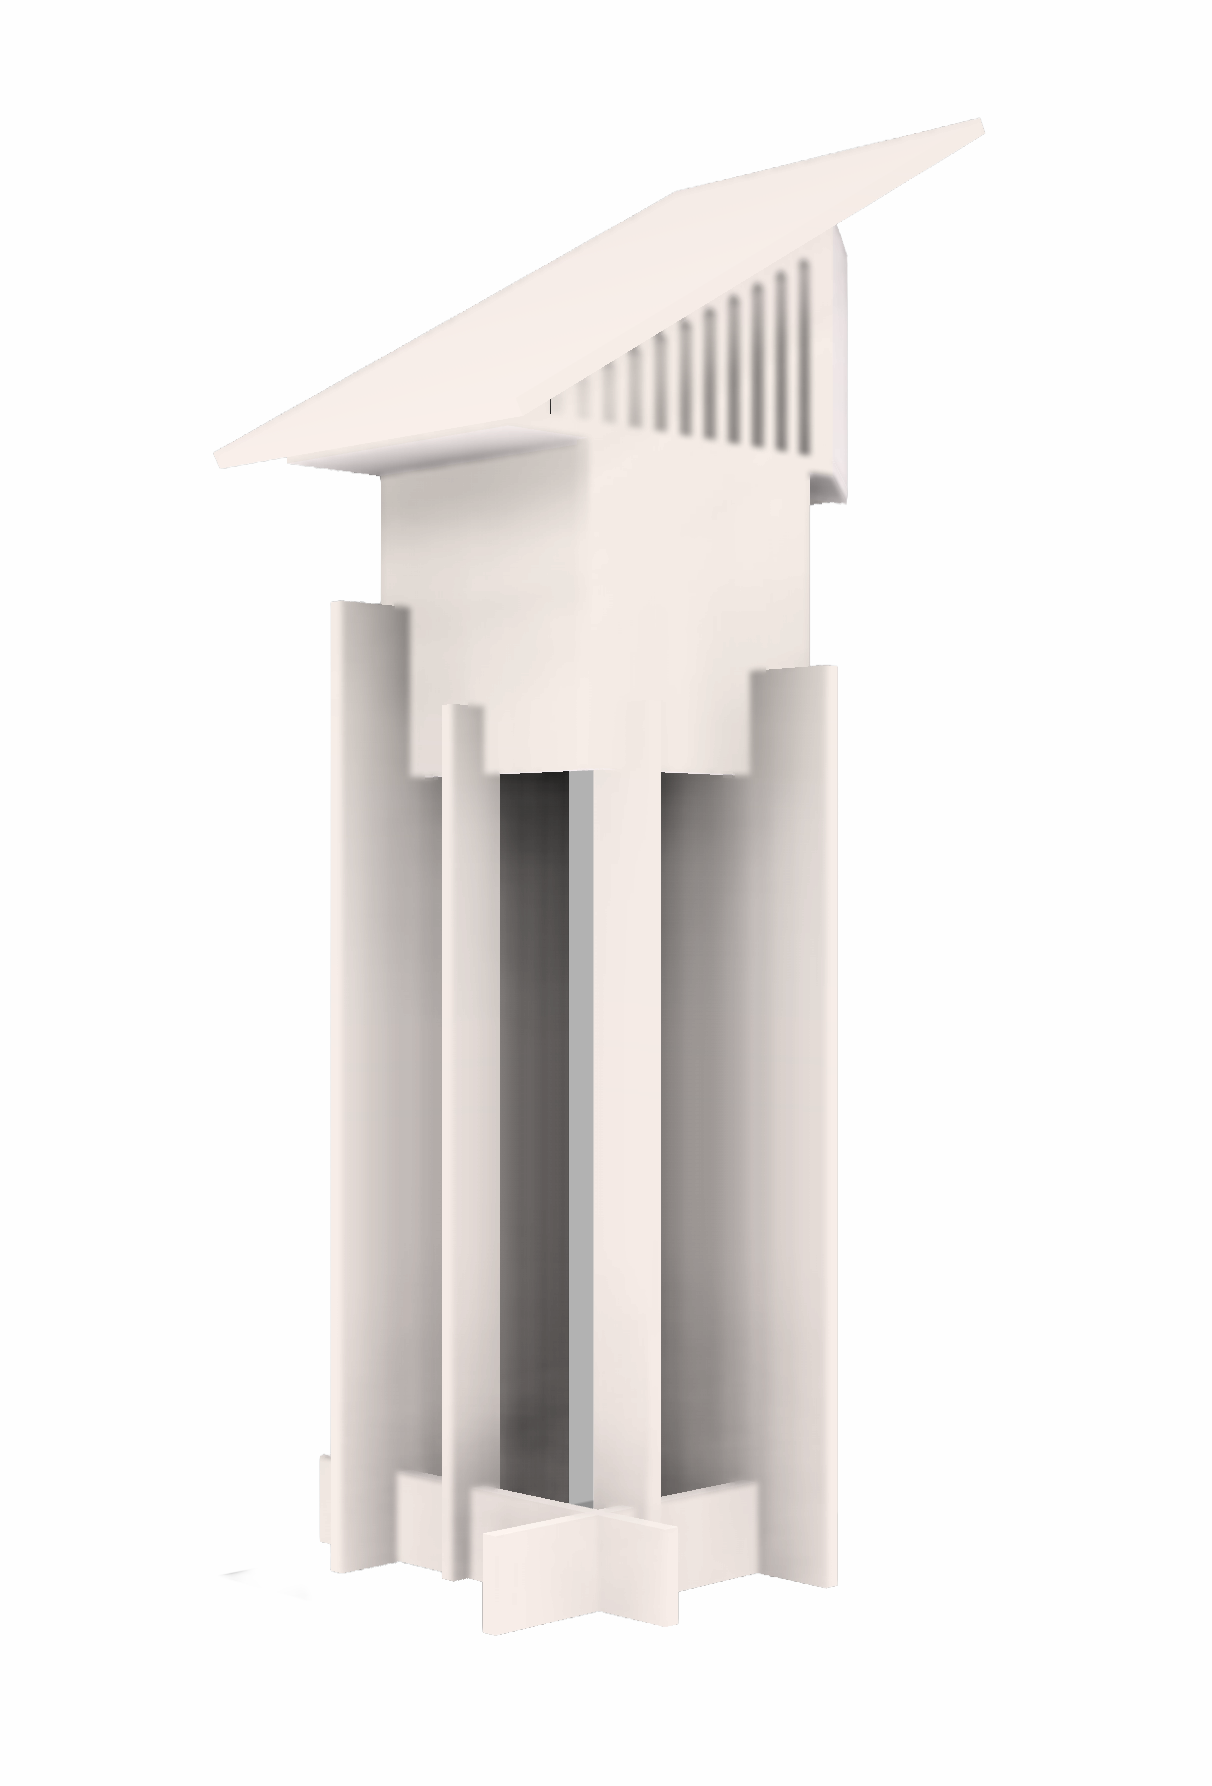
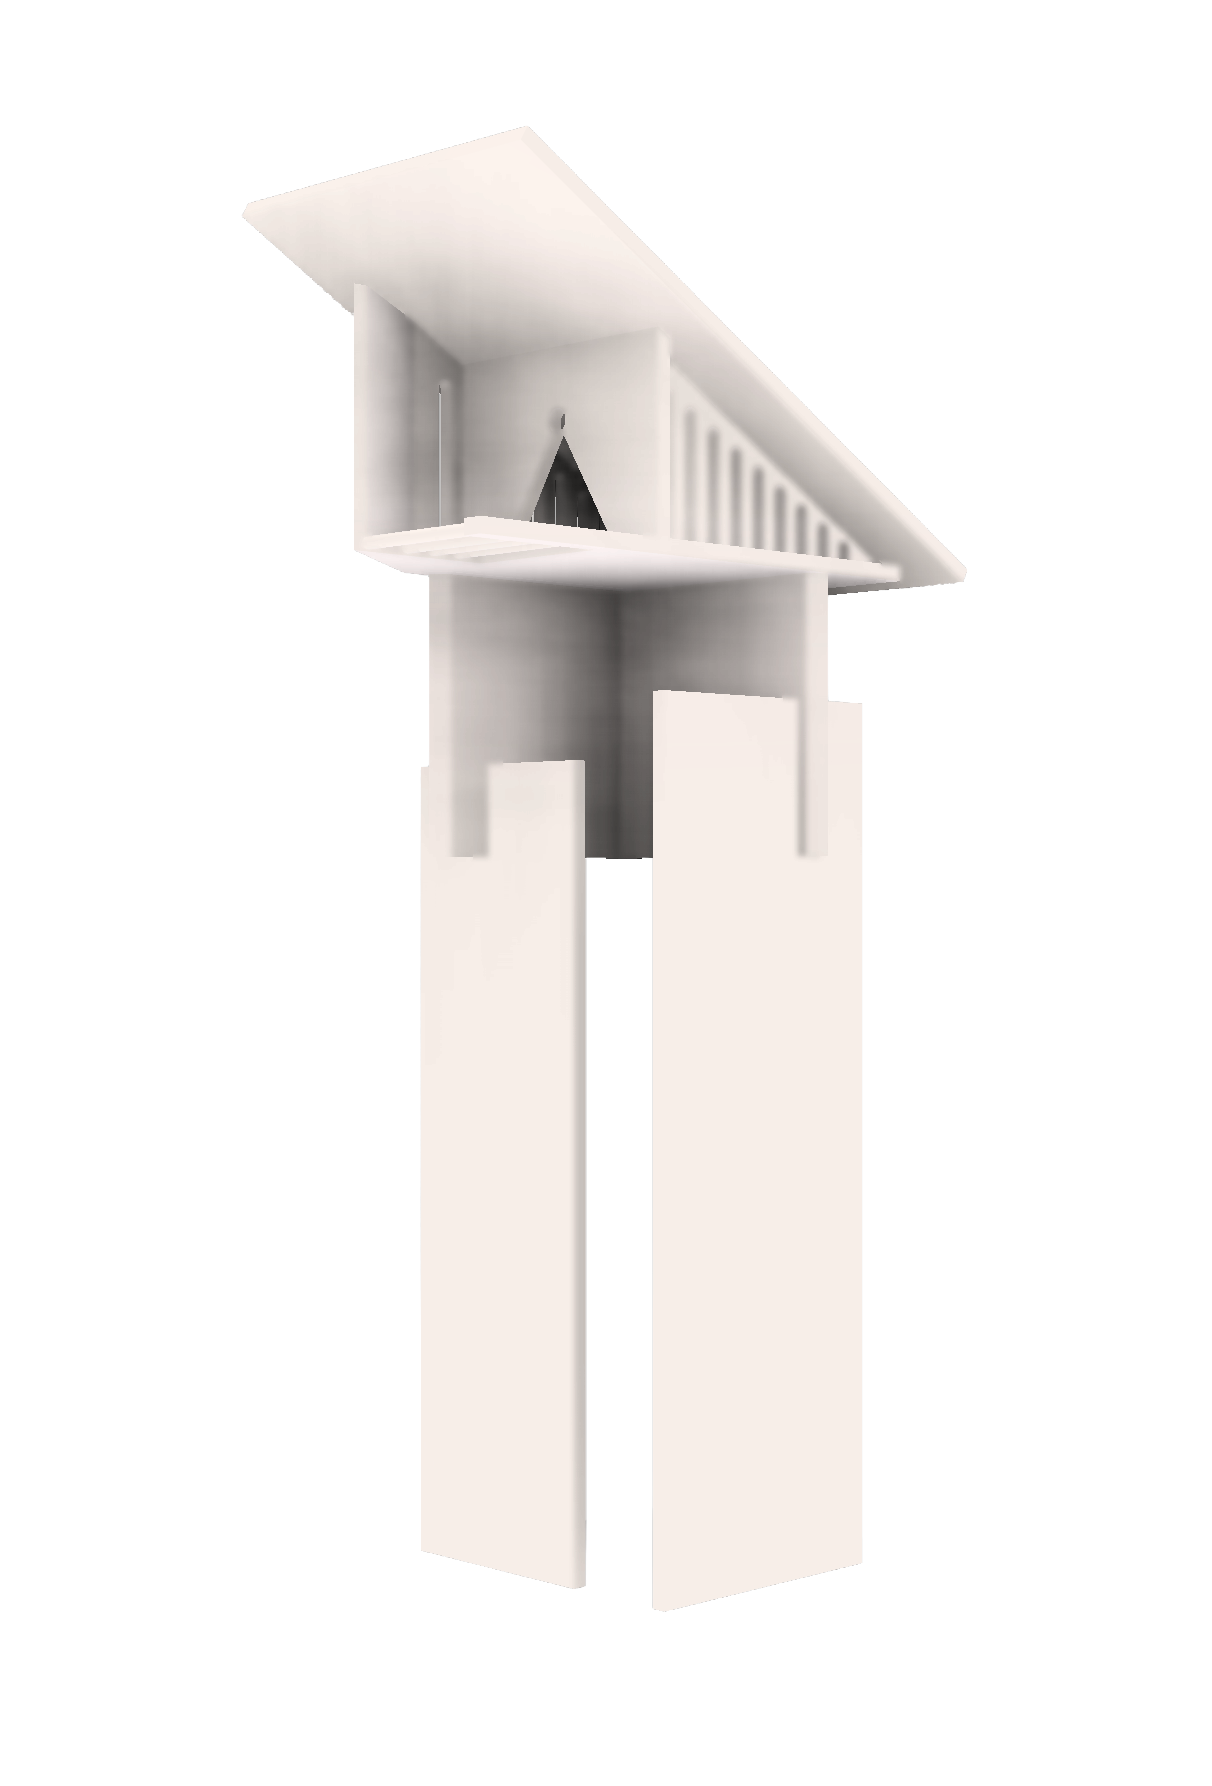
FIRST RENDER
Increased height → proportion testing
Added bottom support bar → structural connection
Focused on structural stability
Heavier, less minimal appearance
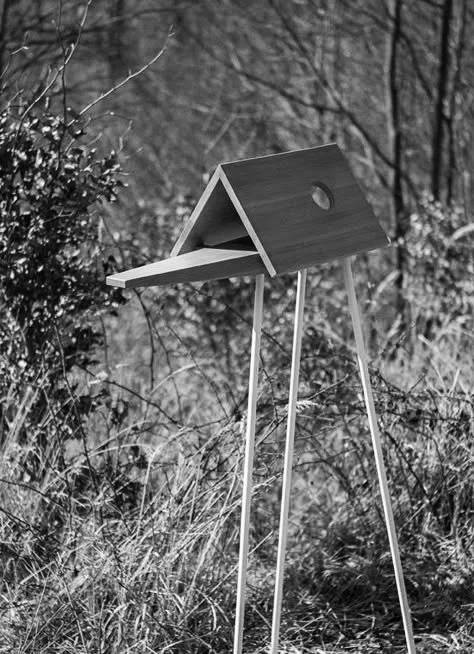
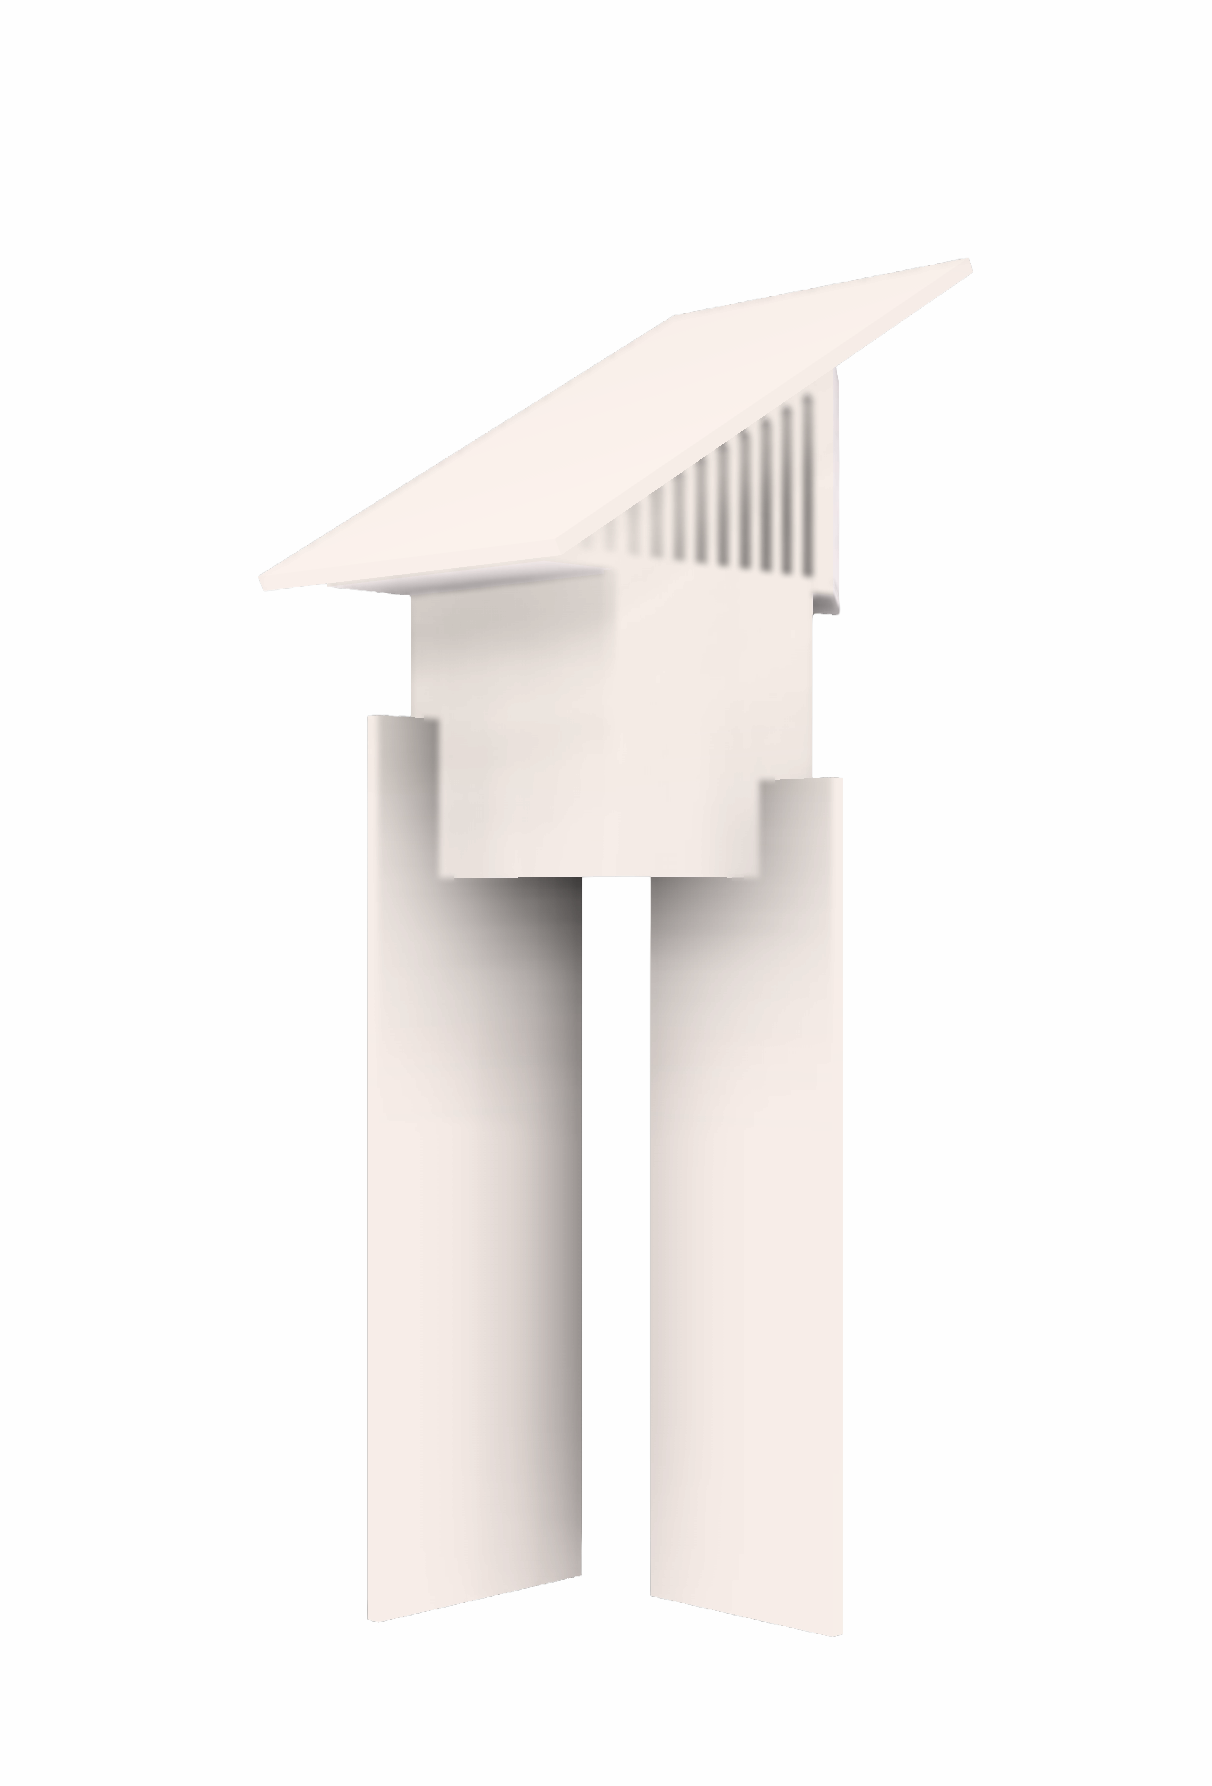
SECOND RENDER
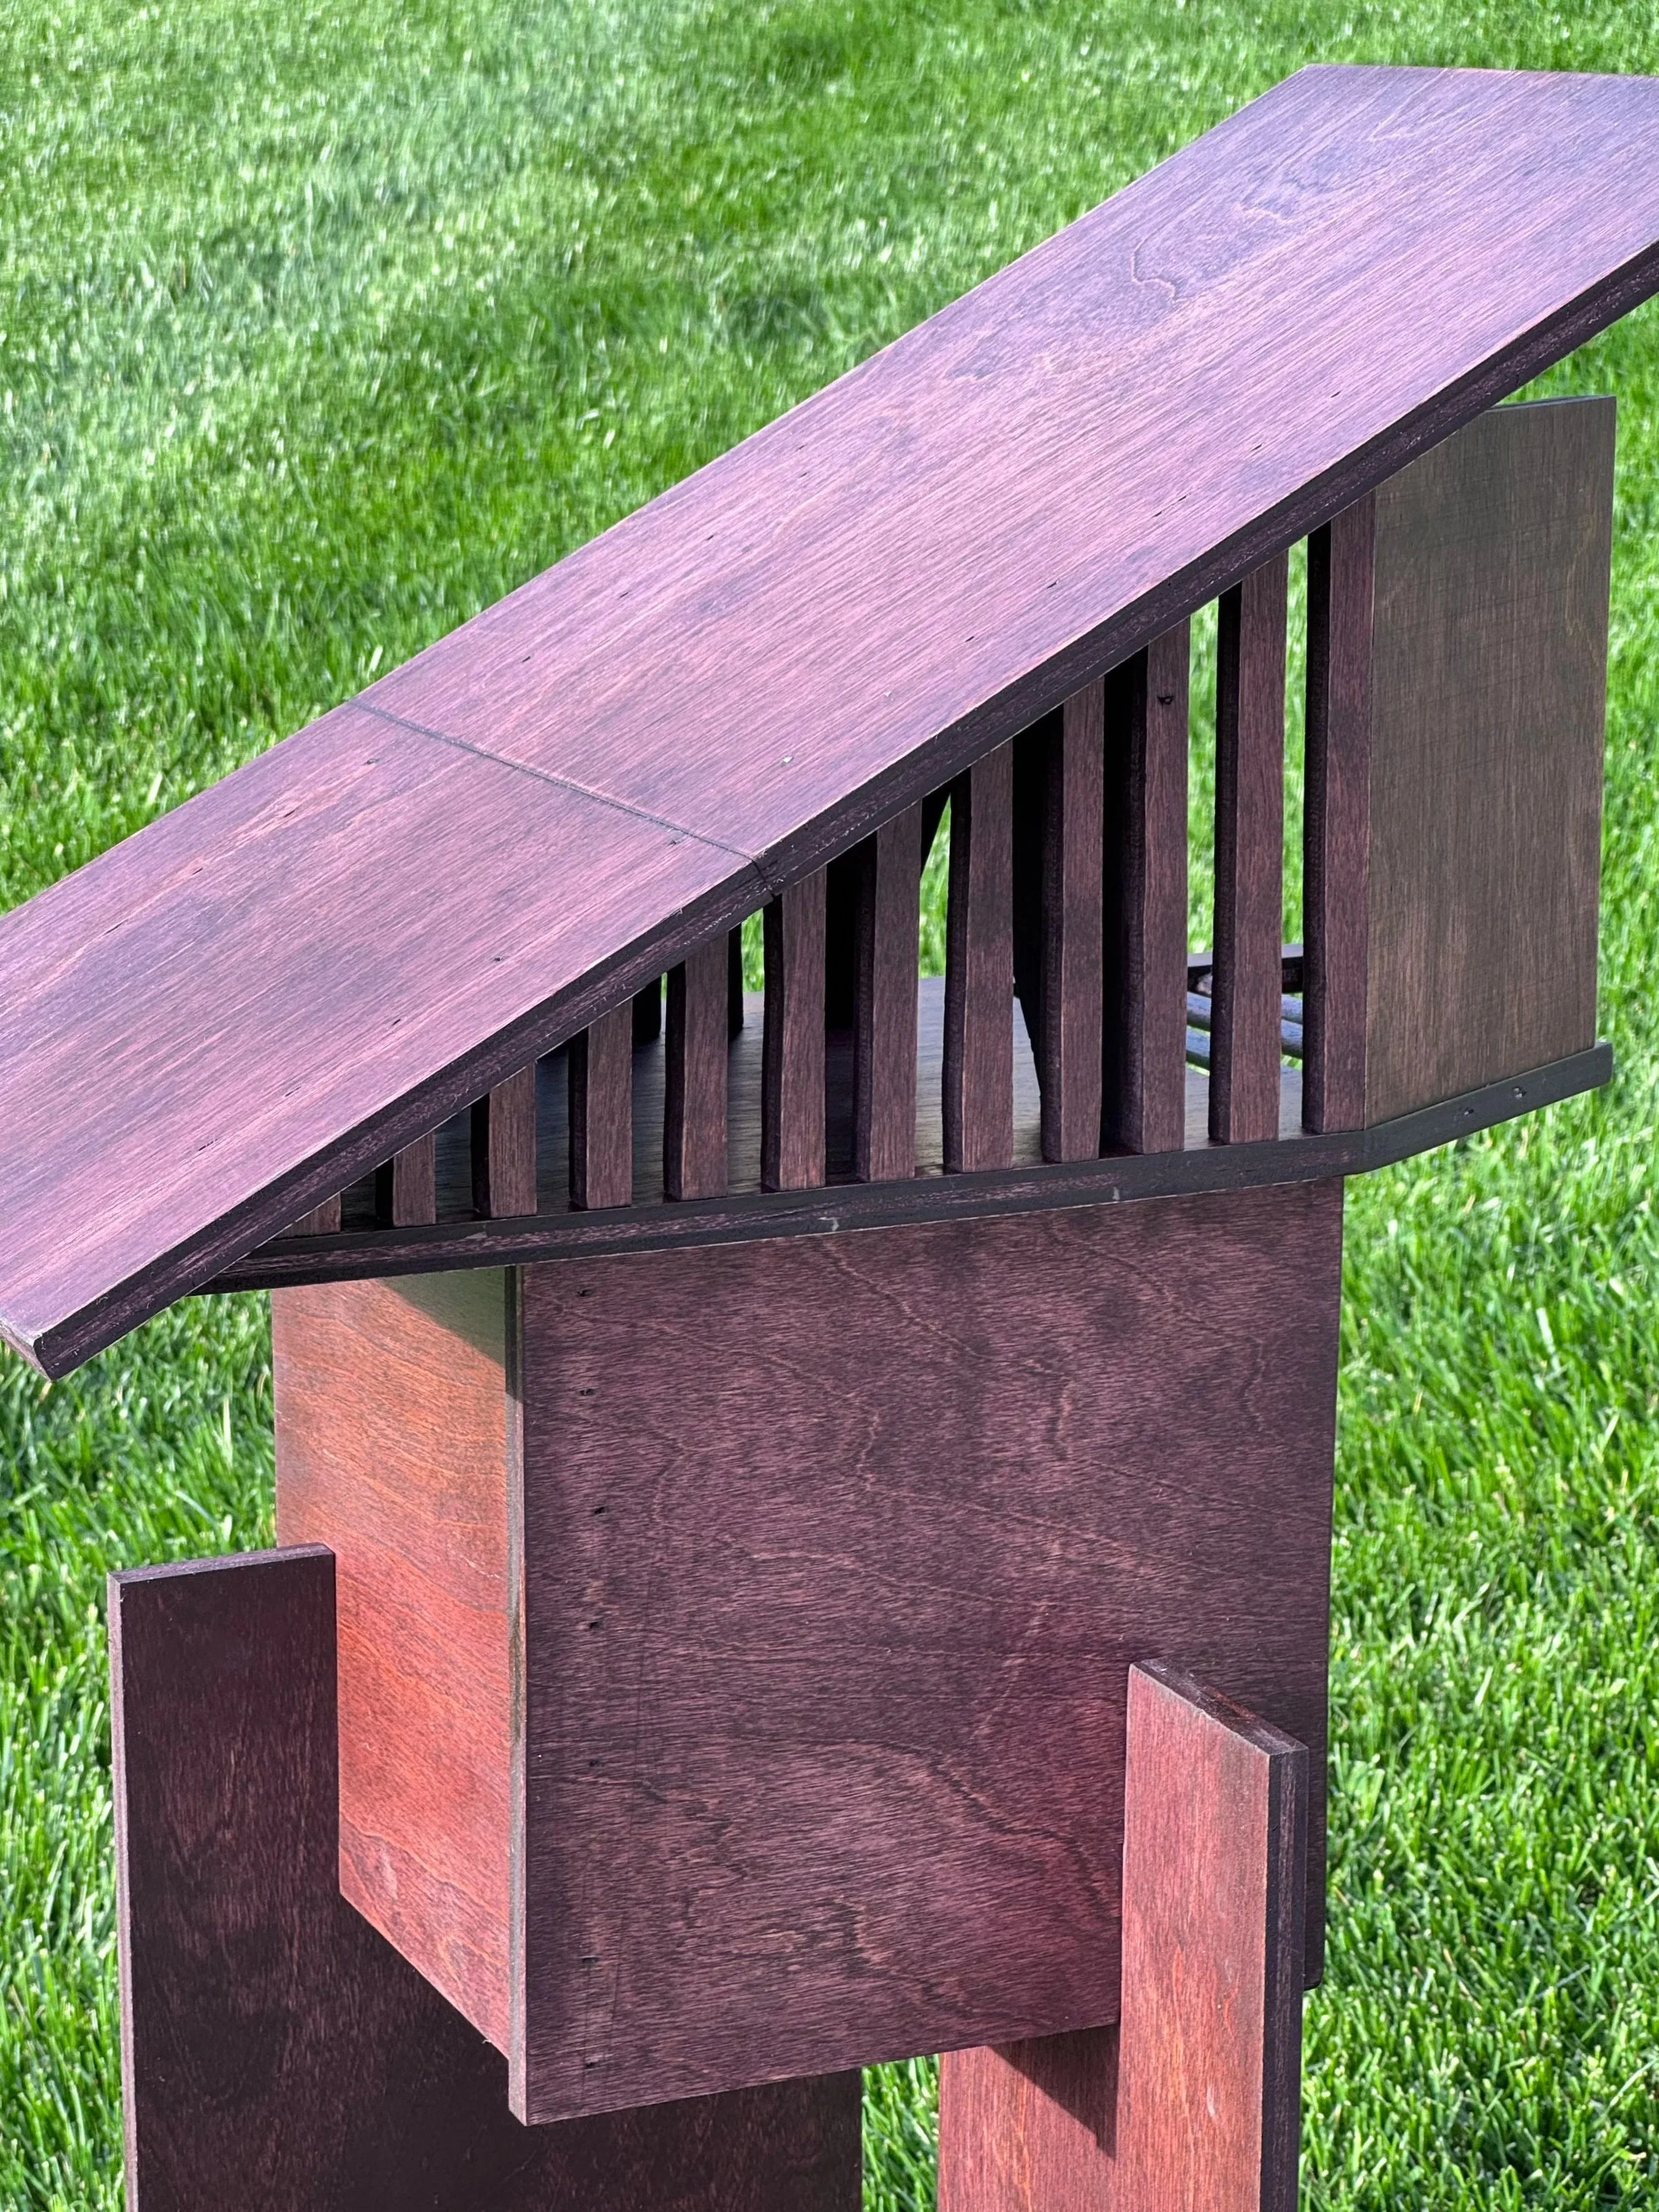
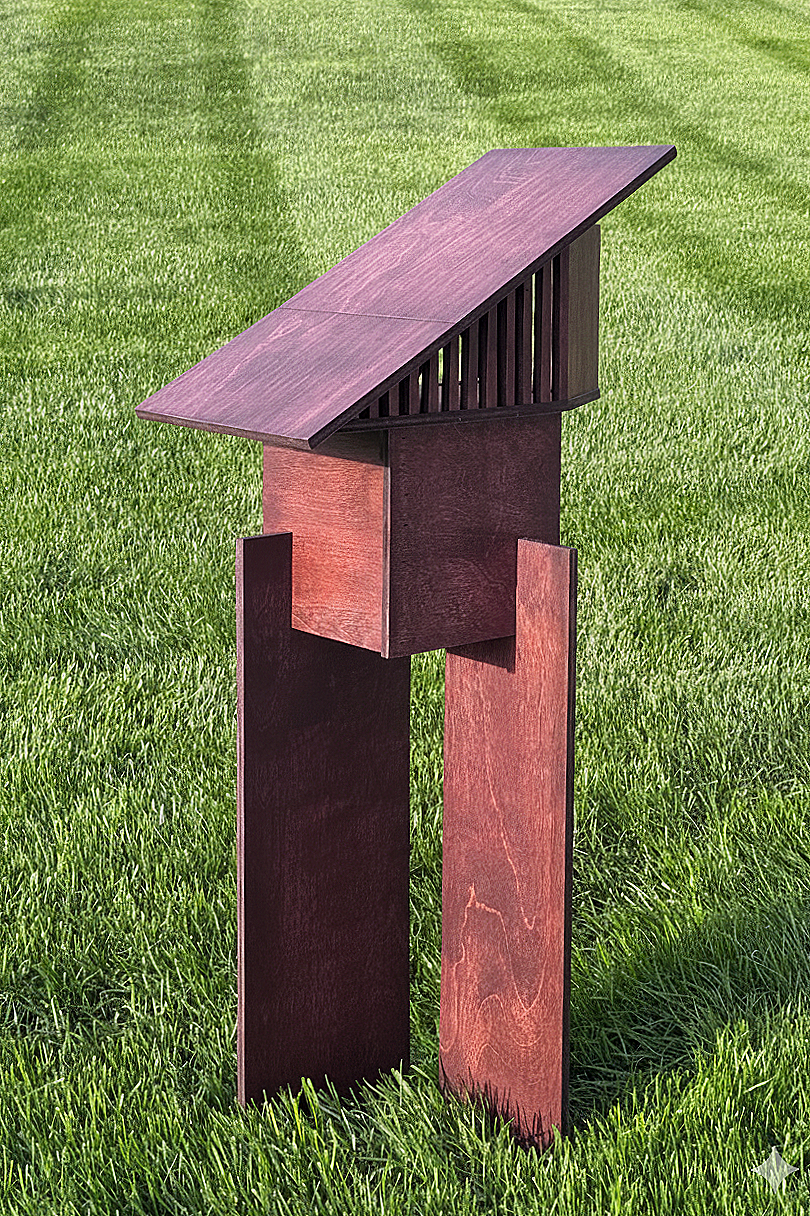
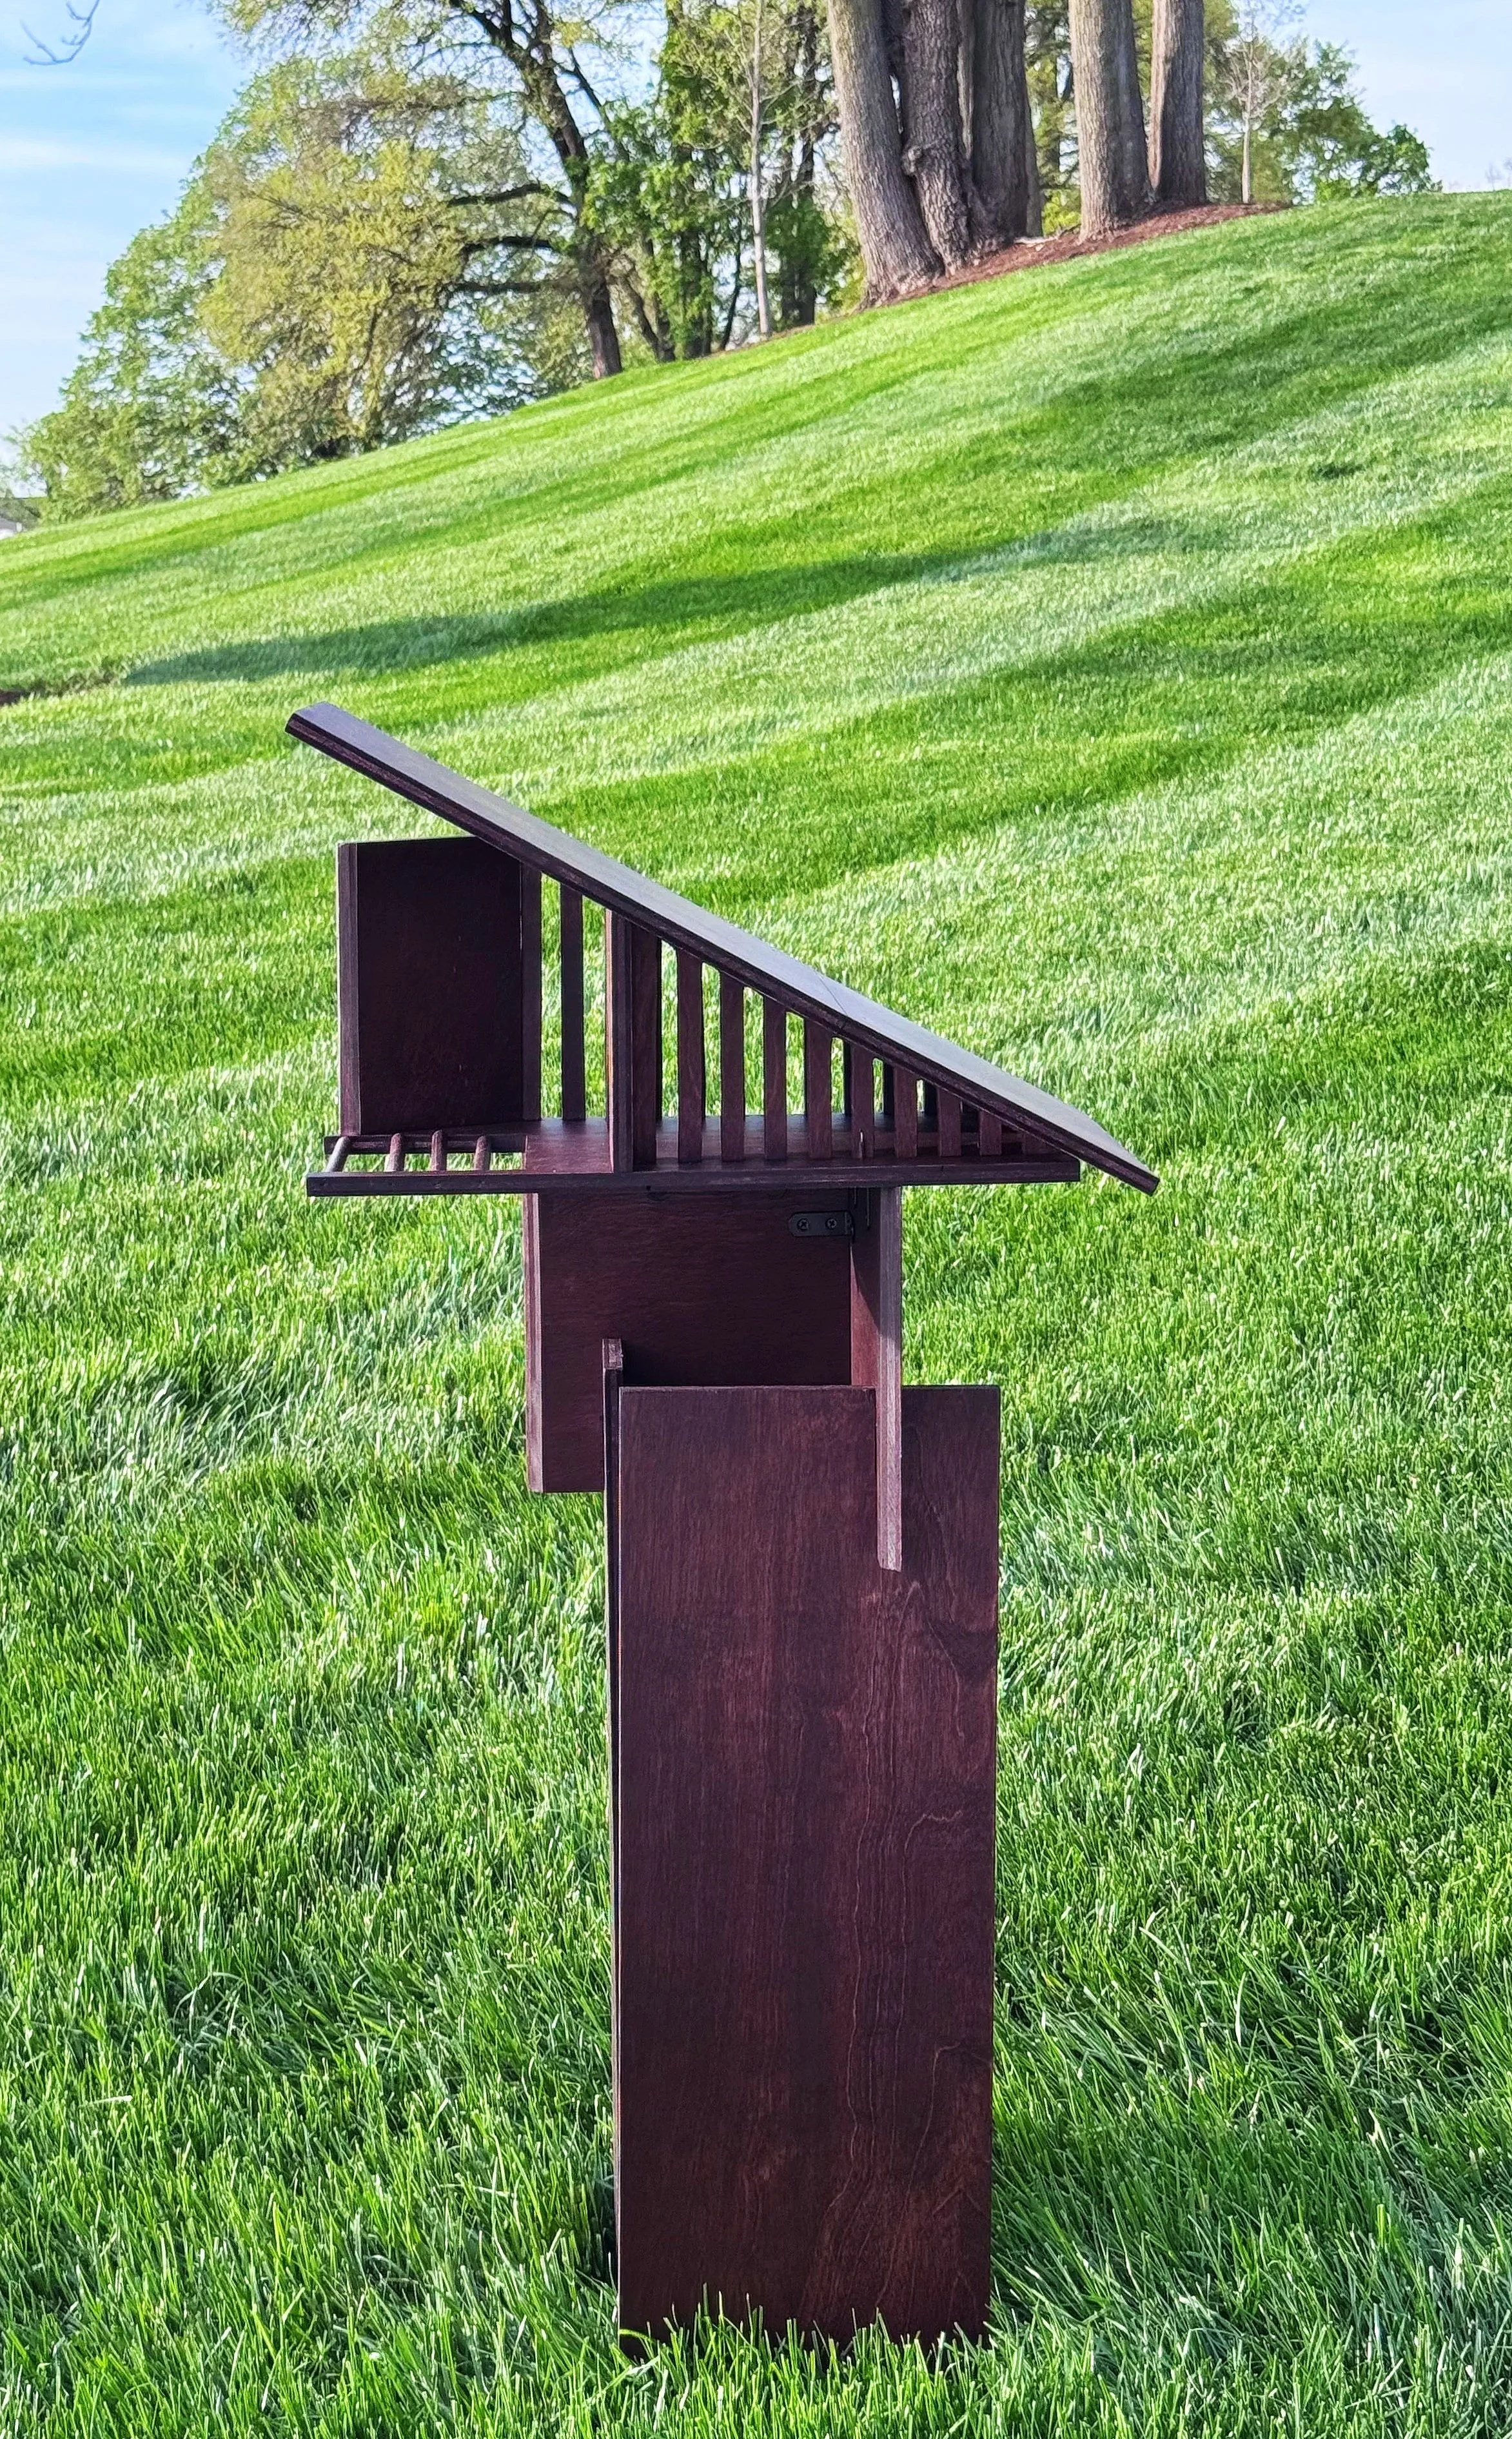
Removed bottom support bar → cleaner silhouette
Vertical panels provide full support
Refined balance between shelter and base
More minimal, geometric form achieved


FABRICATION
PLANNING

-
Basswood / thin plywood for the main structure
Screws & L-brackets for securing the panels
Paper templates & rulers for manual measurement and marking
Sandpaper (various grits) for surface finishing
-
Band saw for cutting curved and irregular shapes
Table saw for clean, straight cuts
Screwdriver for fastening the panels
Sanding machine for refining edges and surfaces
Hand tools for minor adjustments
-
All dimensions were measured manually to match the final render proportions
Each wooden panel was individually cut using the band saw and table saw
Surfaces and edges were refined using the sanding machine
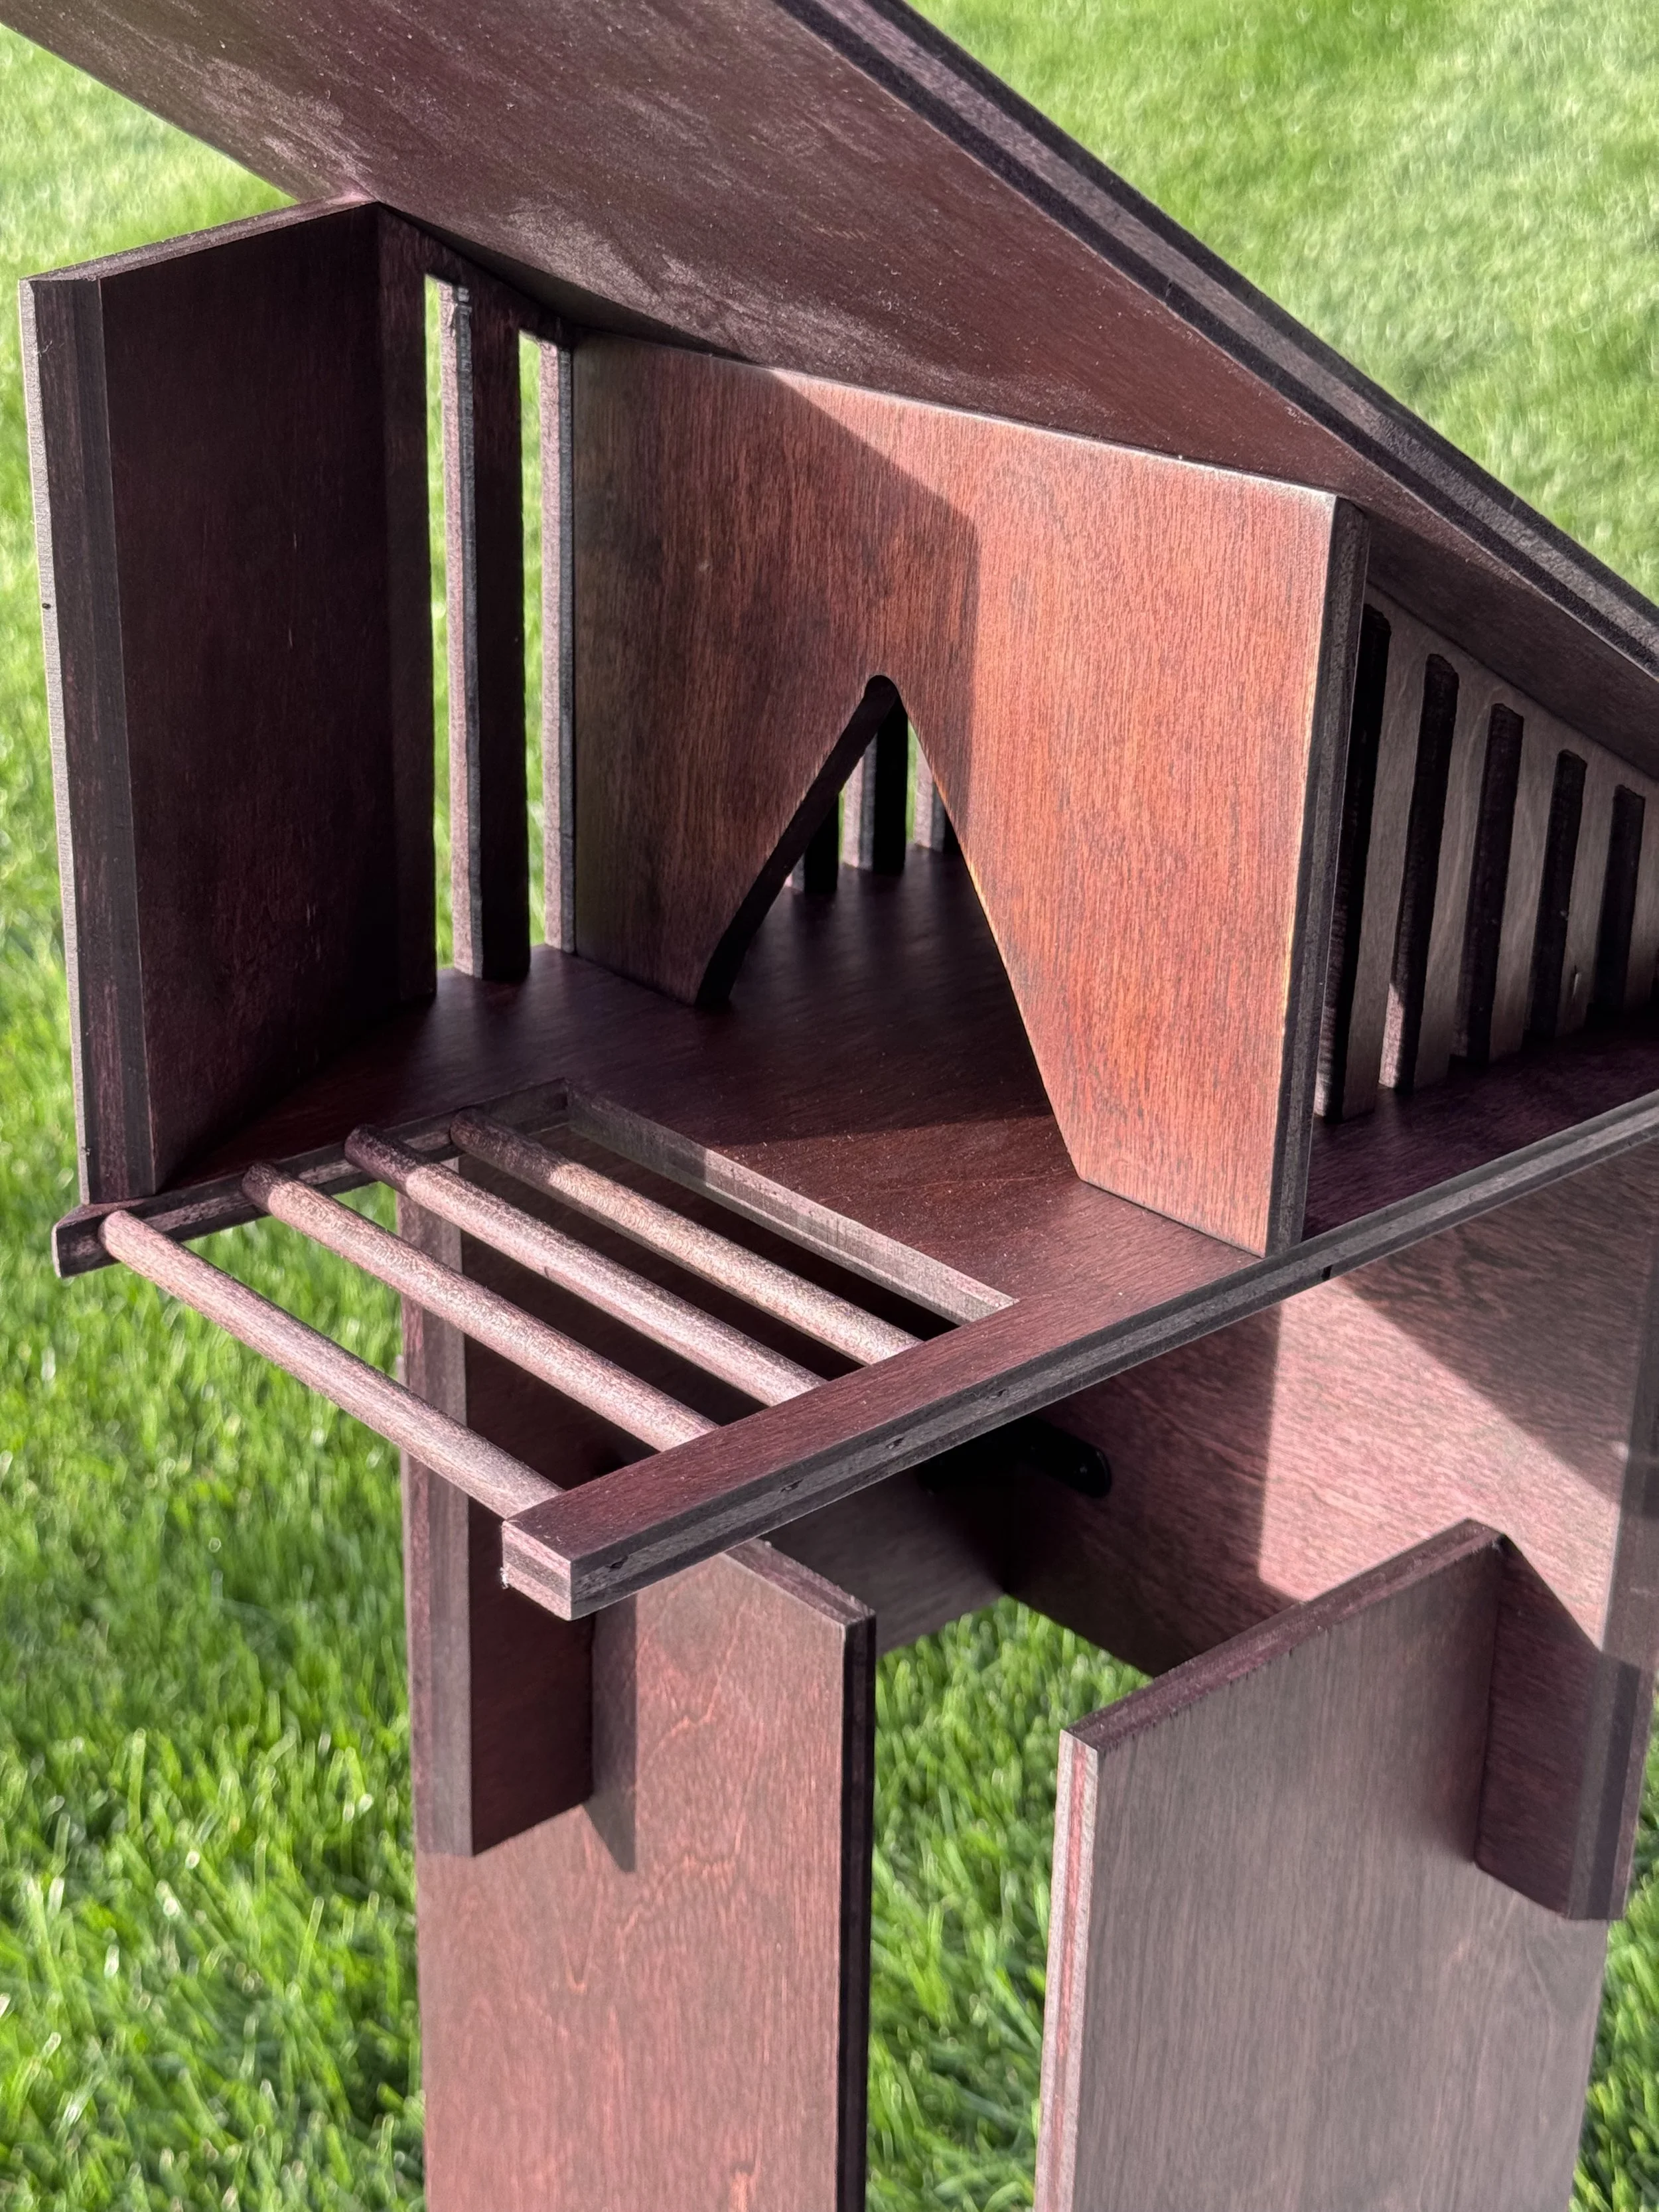
Panels were assembled using L-shaped brackets and screws, ensuring strong mechanical stability
The two vertical panels were aligned carefully to maintain balance and recreate the minimal geometric silhouette
-
Achieve a clean exterior with no visible hardware
Ensure strong stability through hidden mechanical connections
Maintain the minimal geometric form explored in the digital model
Reproduce accurate proportions through manual measurement and cutting
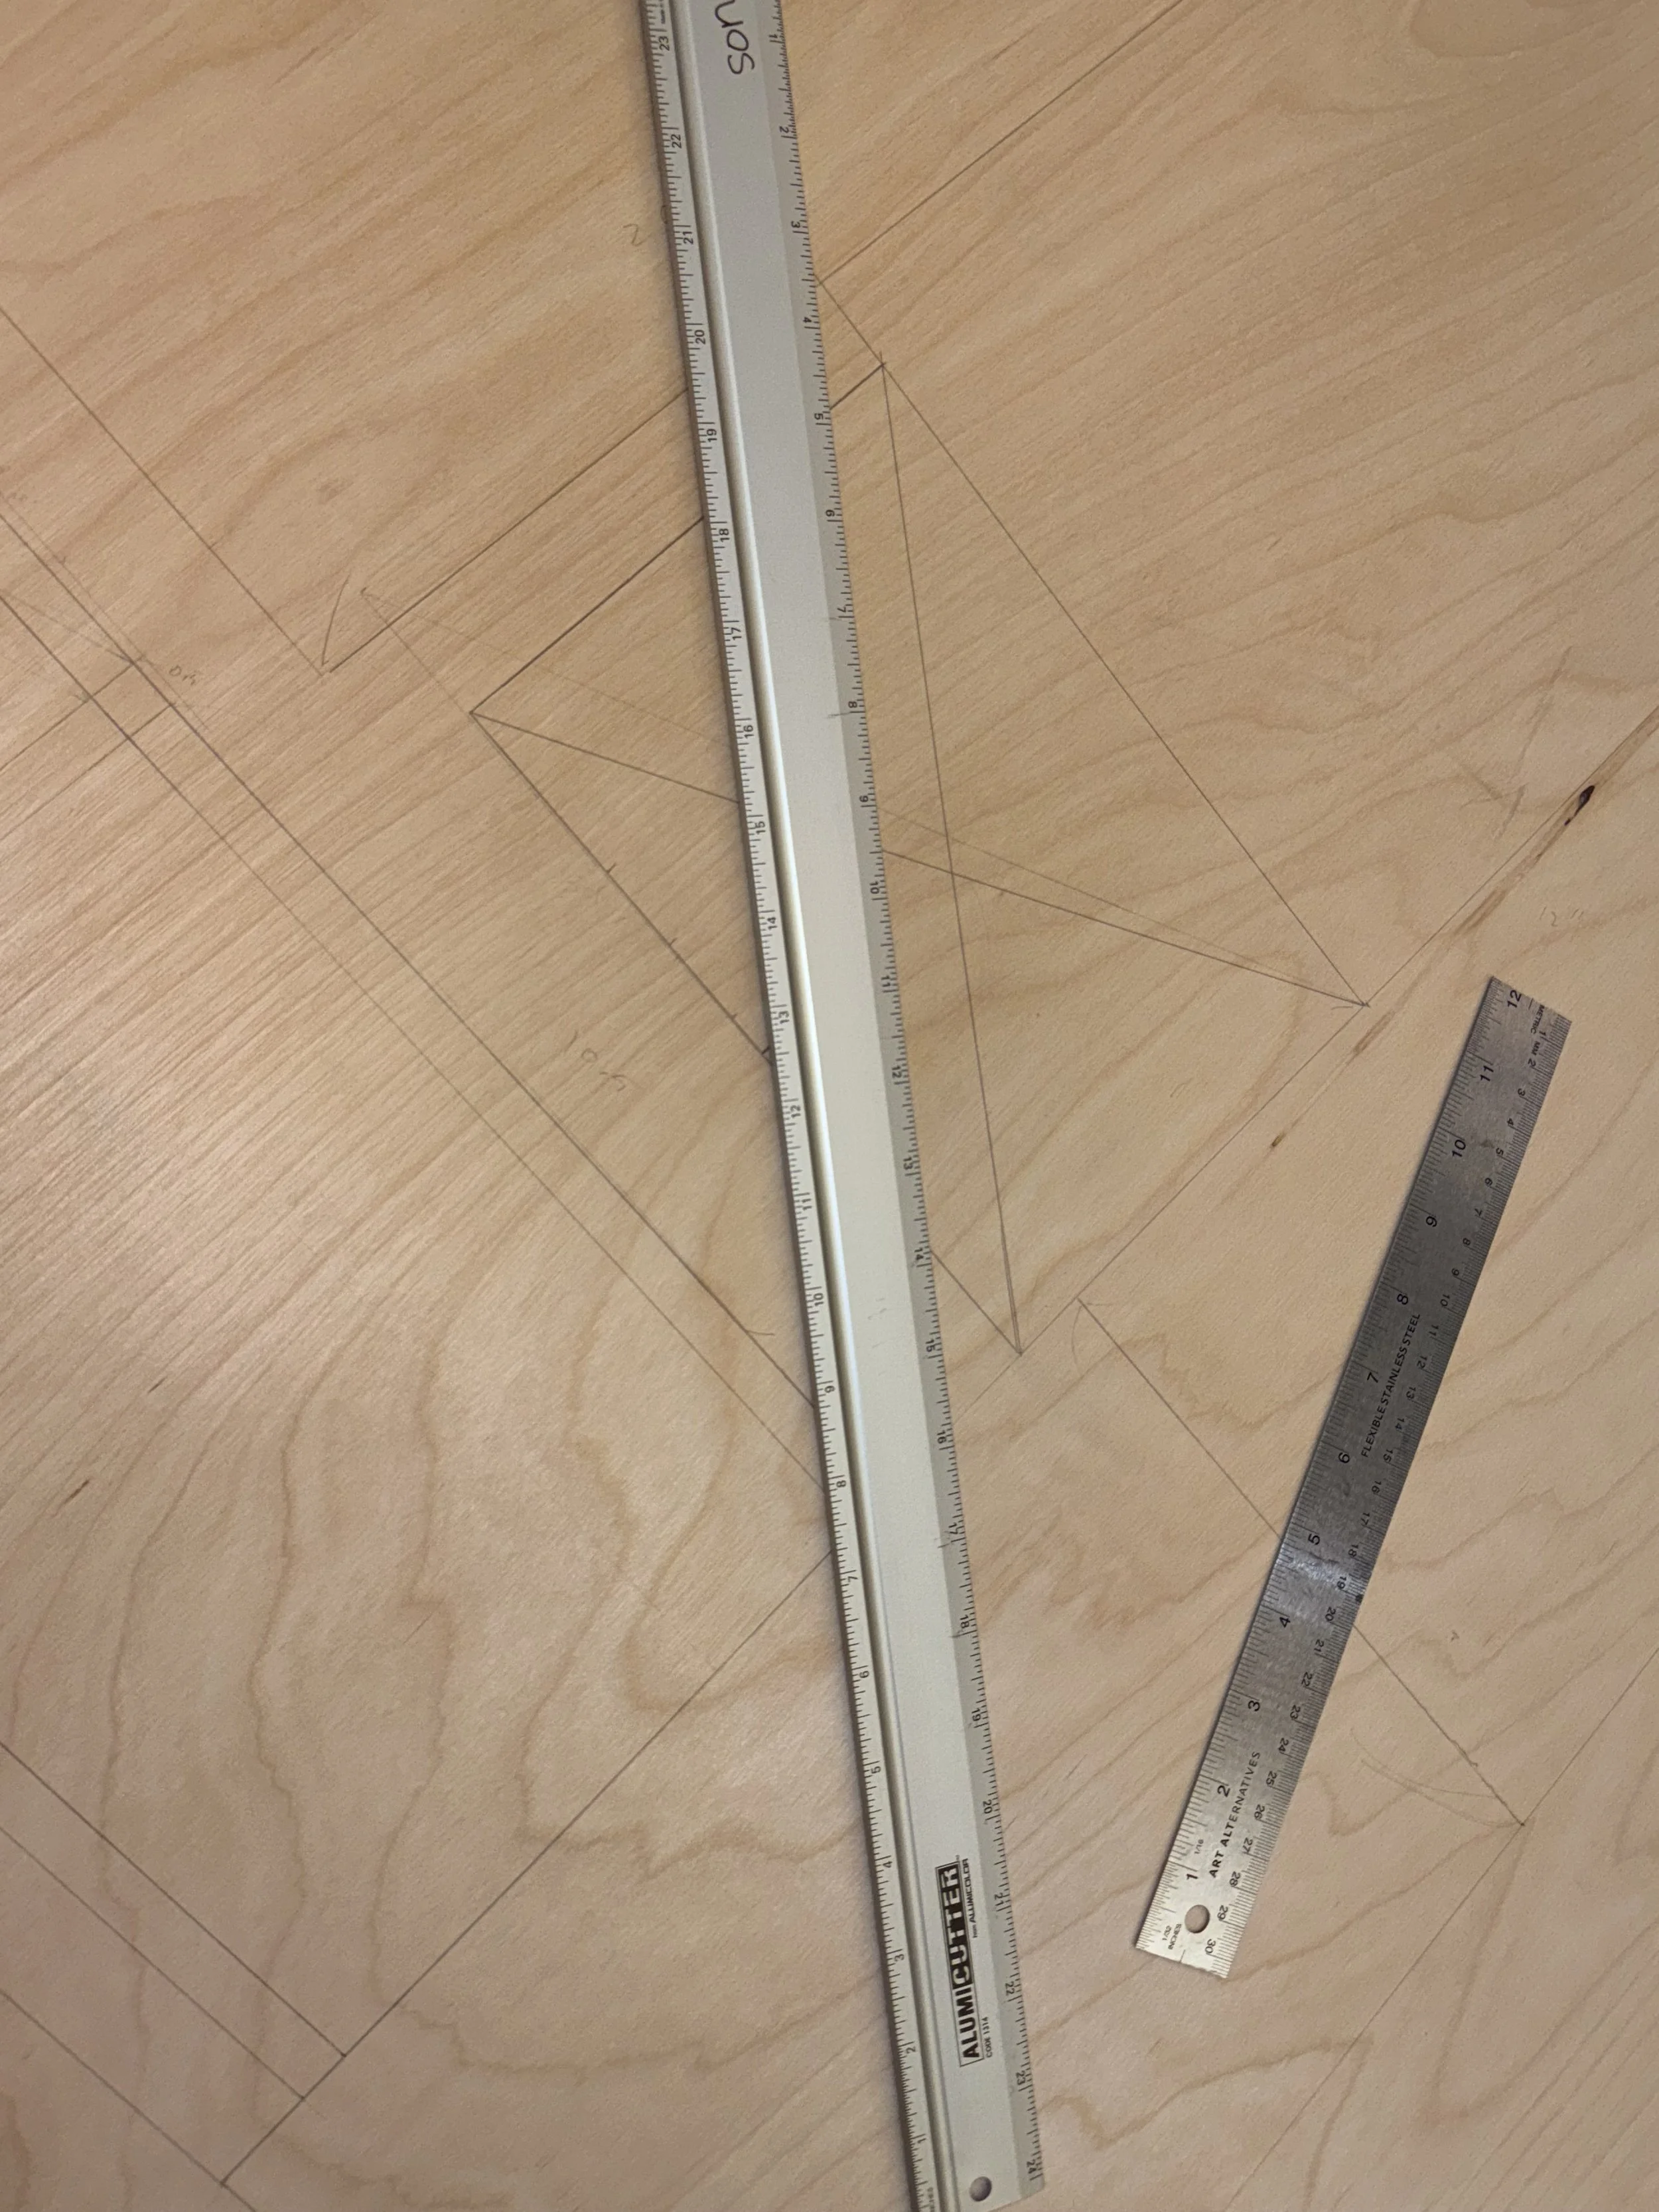

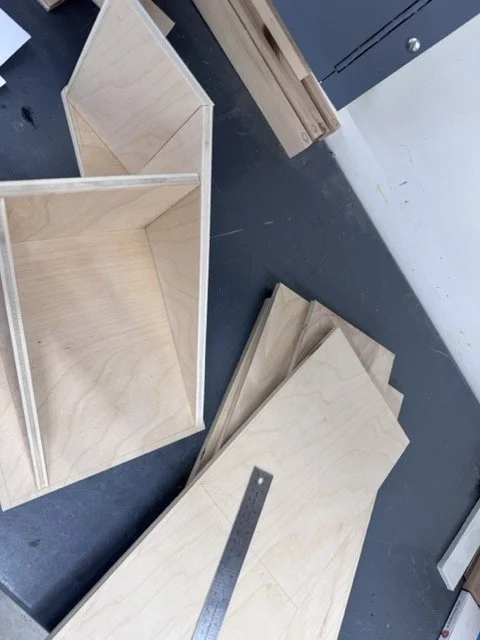
Parts Cutting & Preparation
Components were measured, marked, and manually cut to ensure accurate final proportions.
-
All required measurements were drafted onto paper based on the render.
-
The cutting lines and reference points were hand-drawn directly onto the wooden panels.
-
The marked shapes were precisely cut using a table saw, ensuring clean and accurate edges.
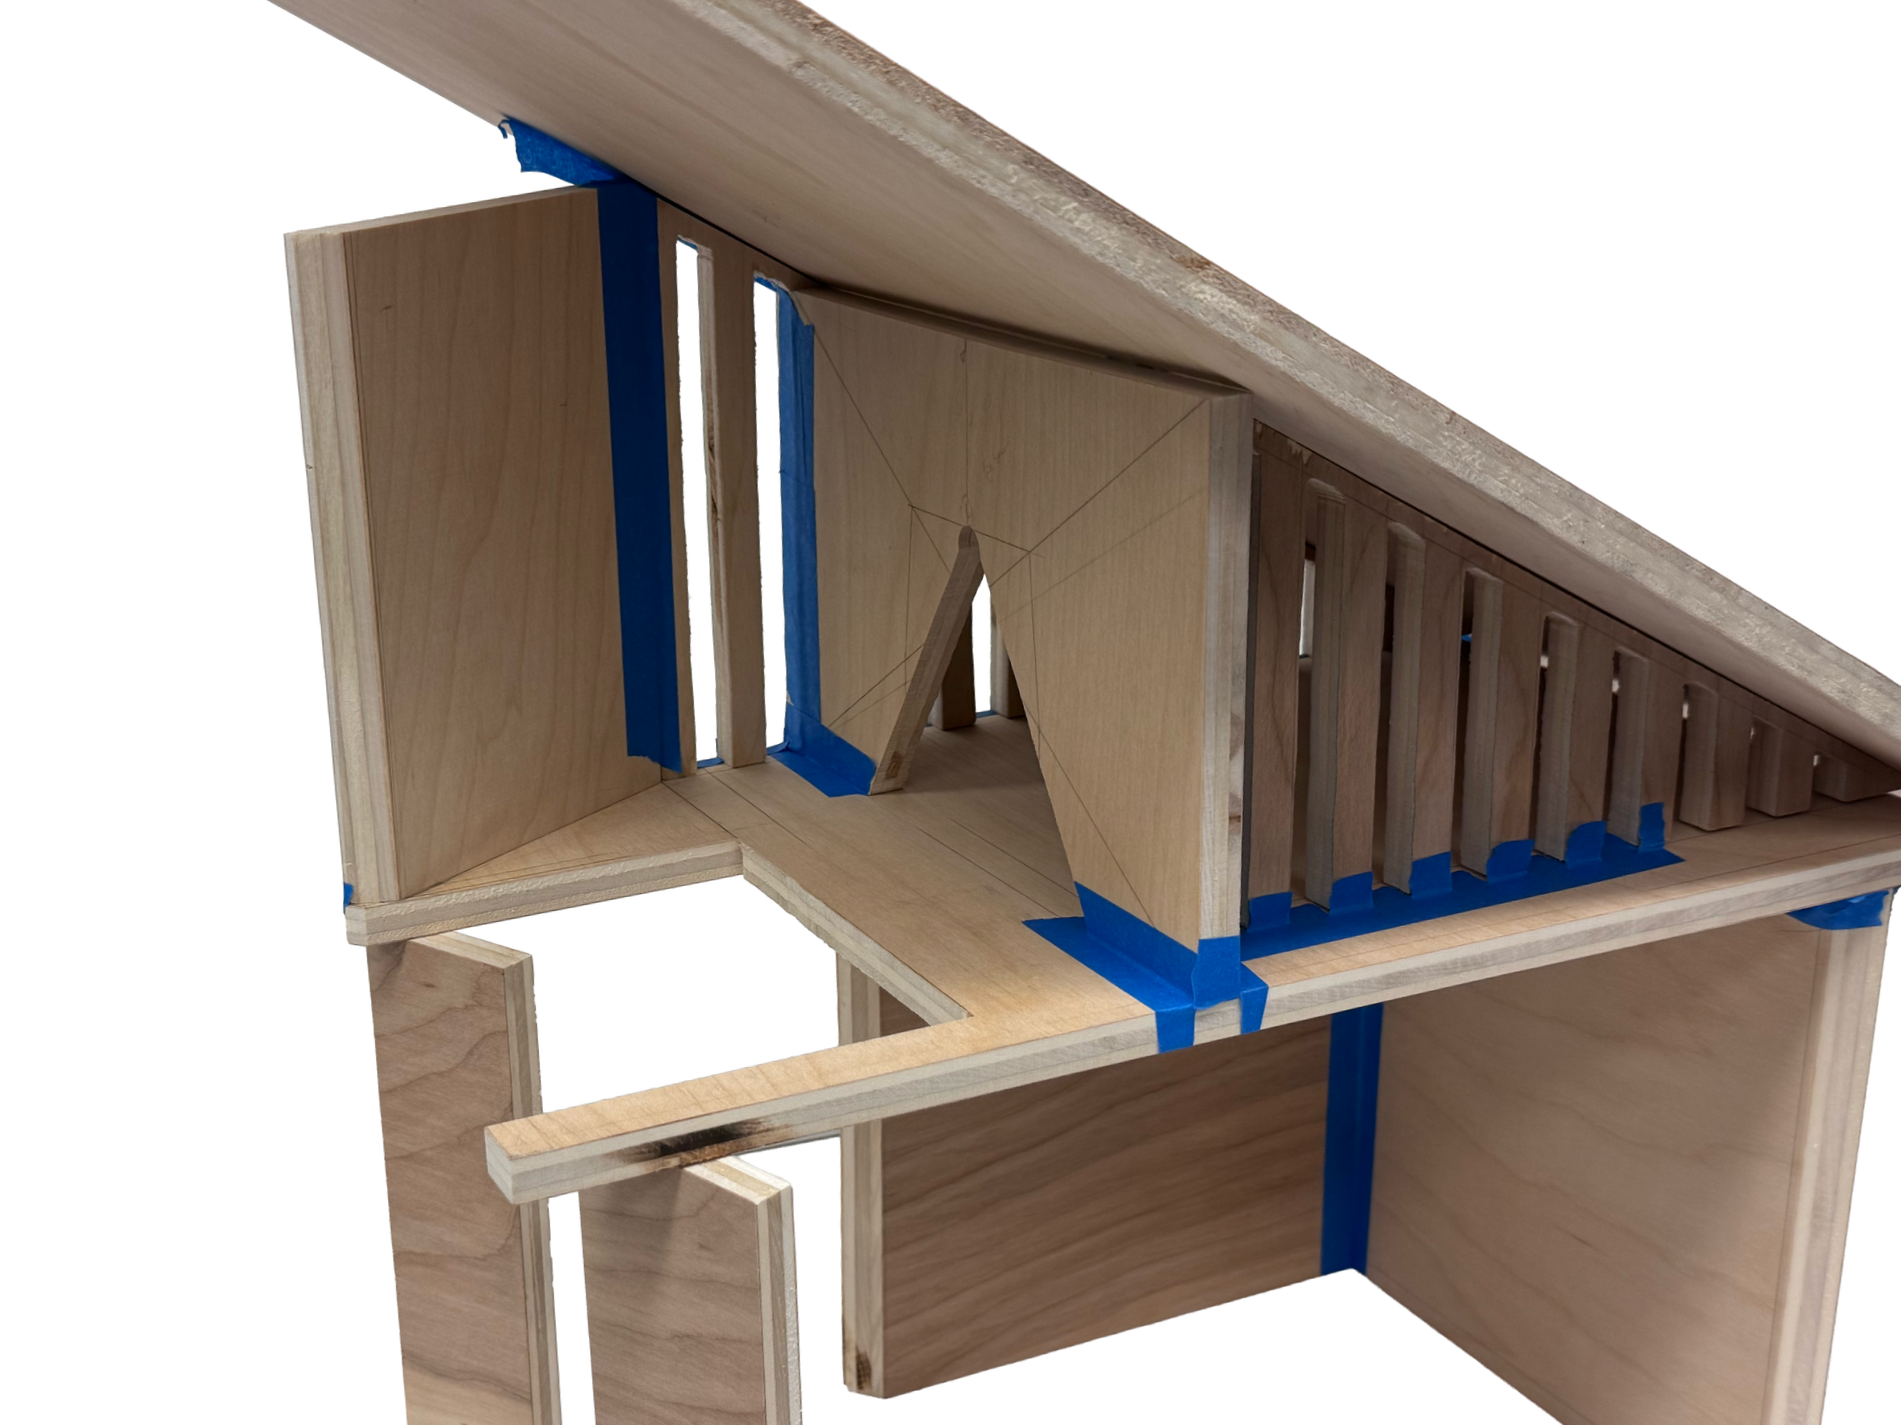


Pre-Assembly / Parts Layout
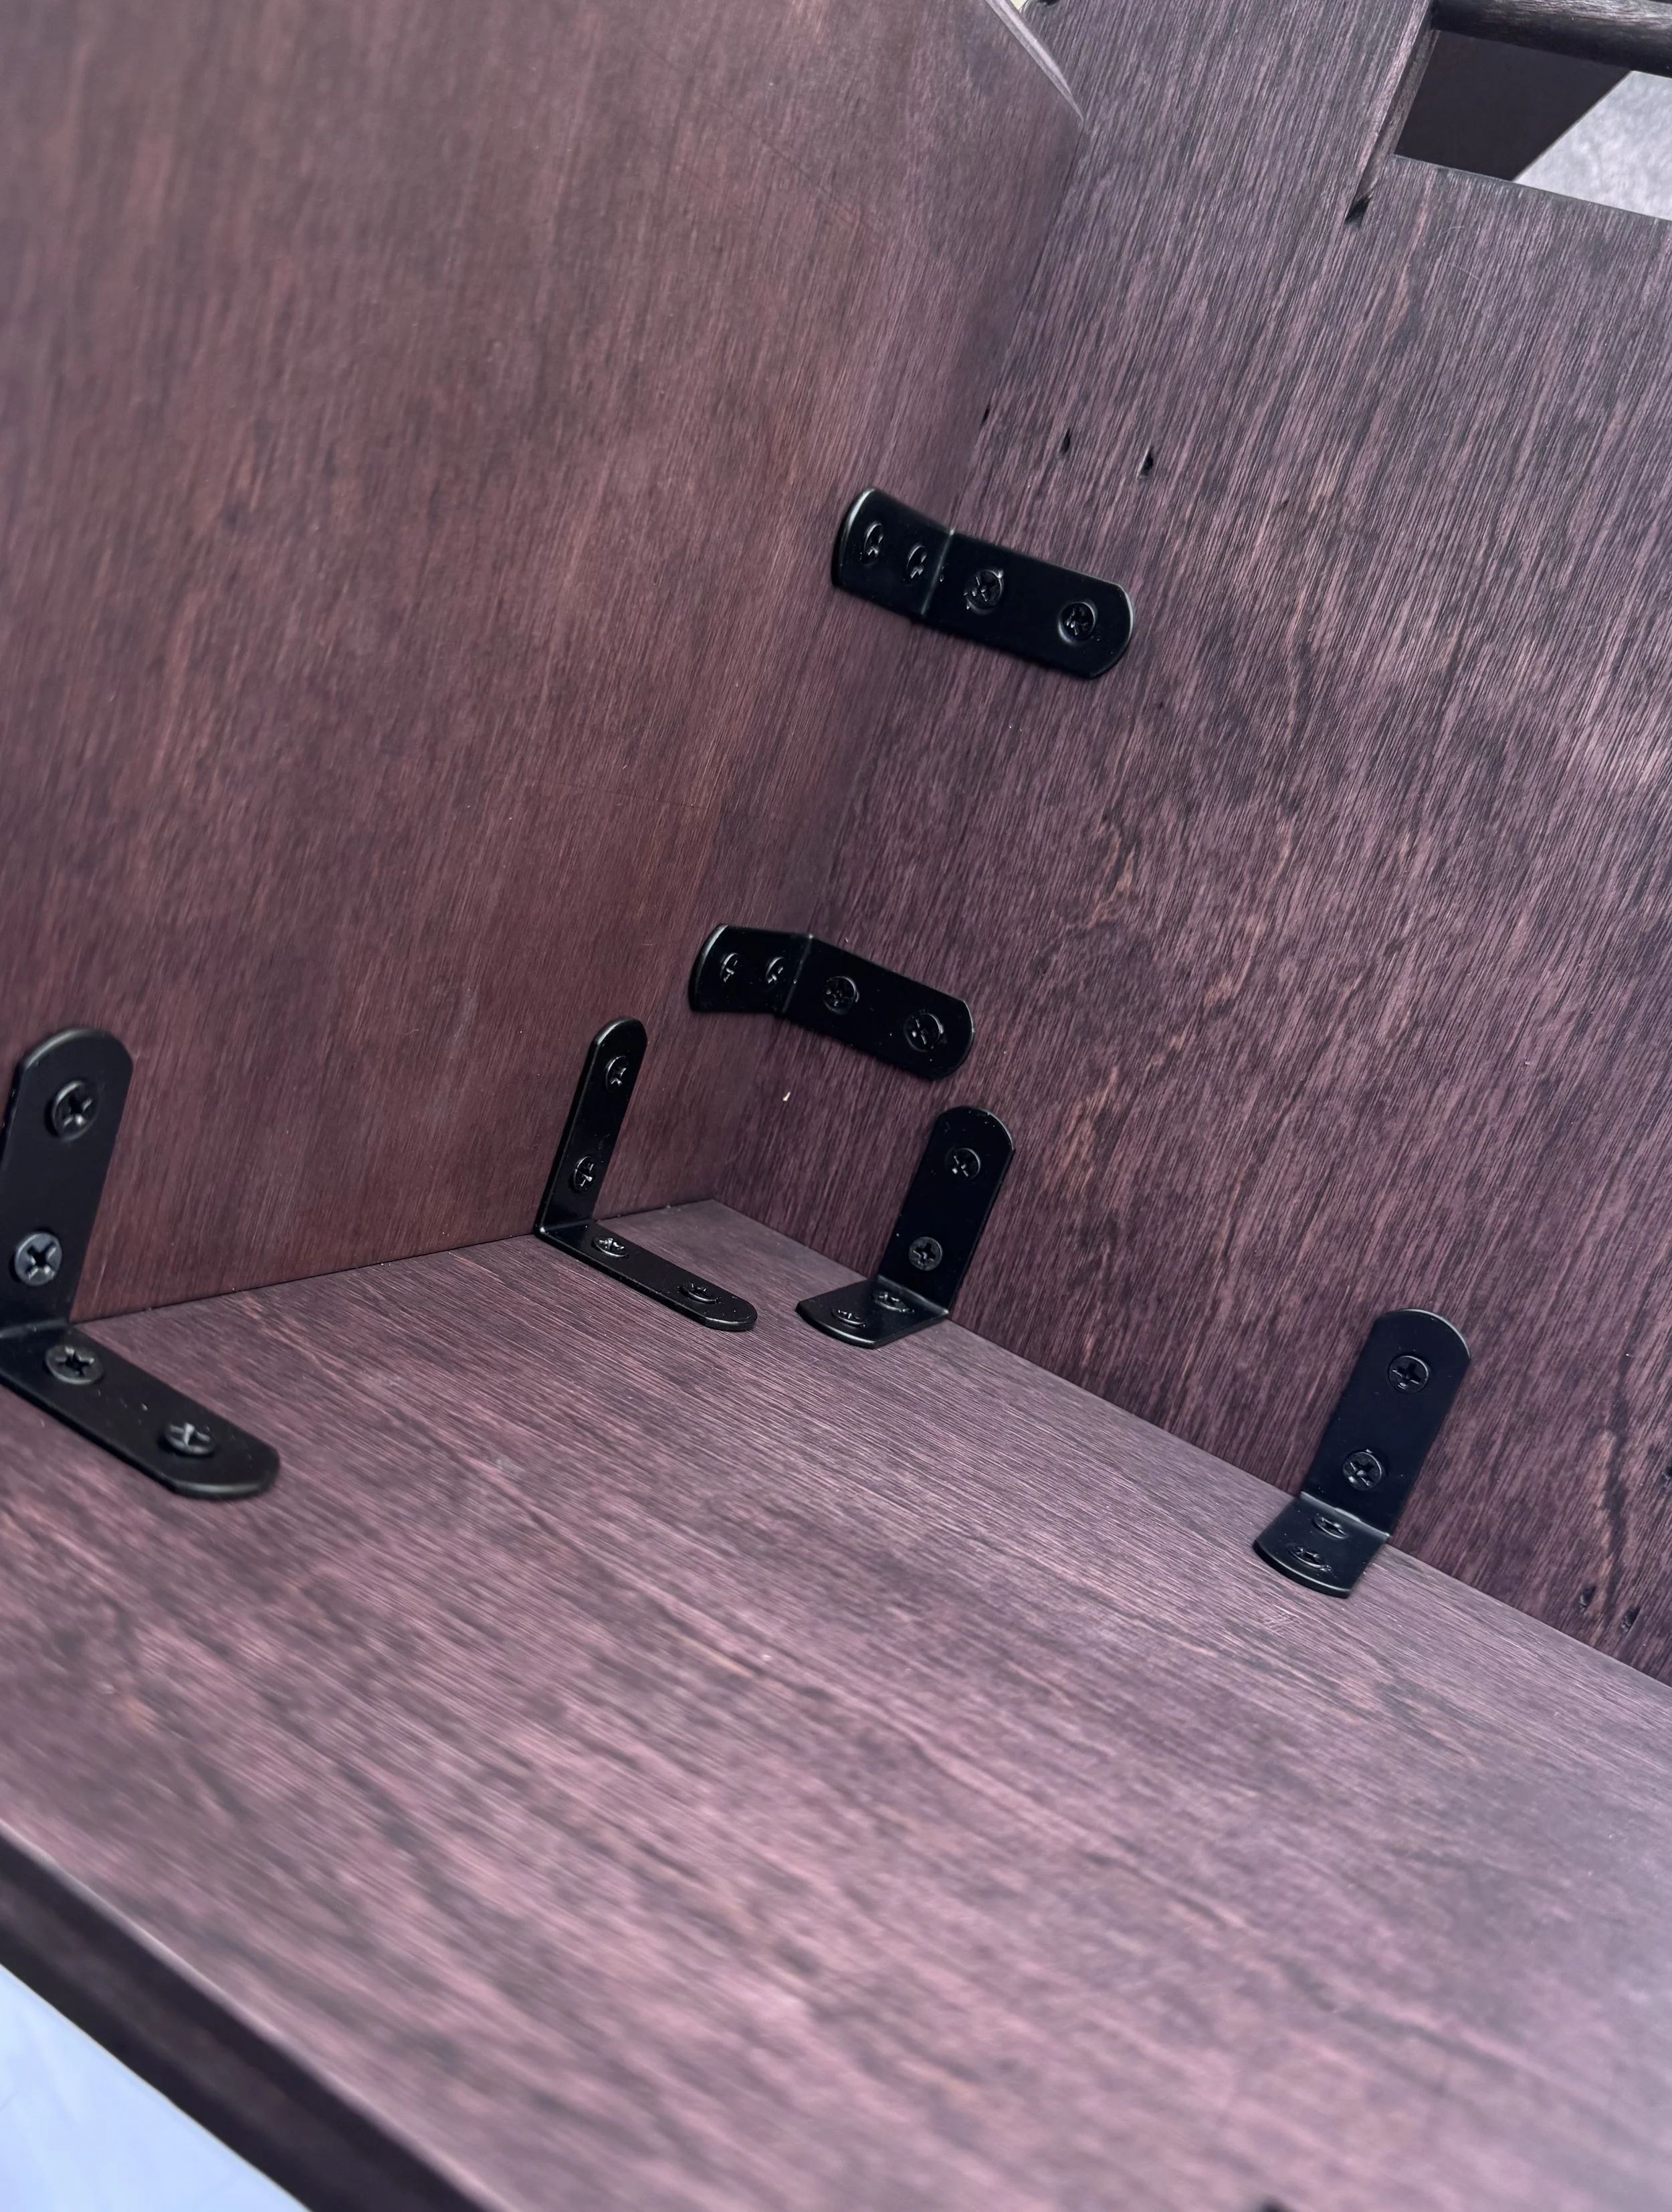
Checked the structural balance and accurately marked the connection points.

Fabrication Steps
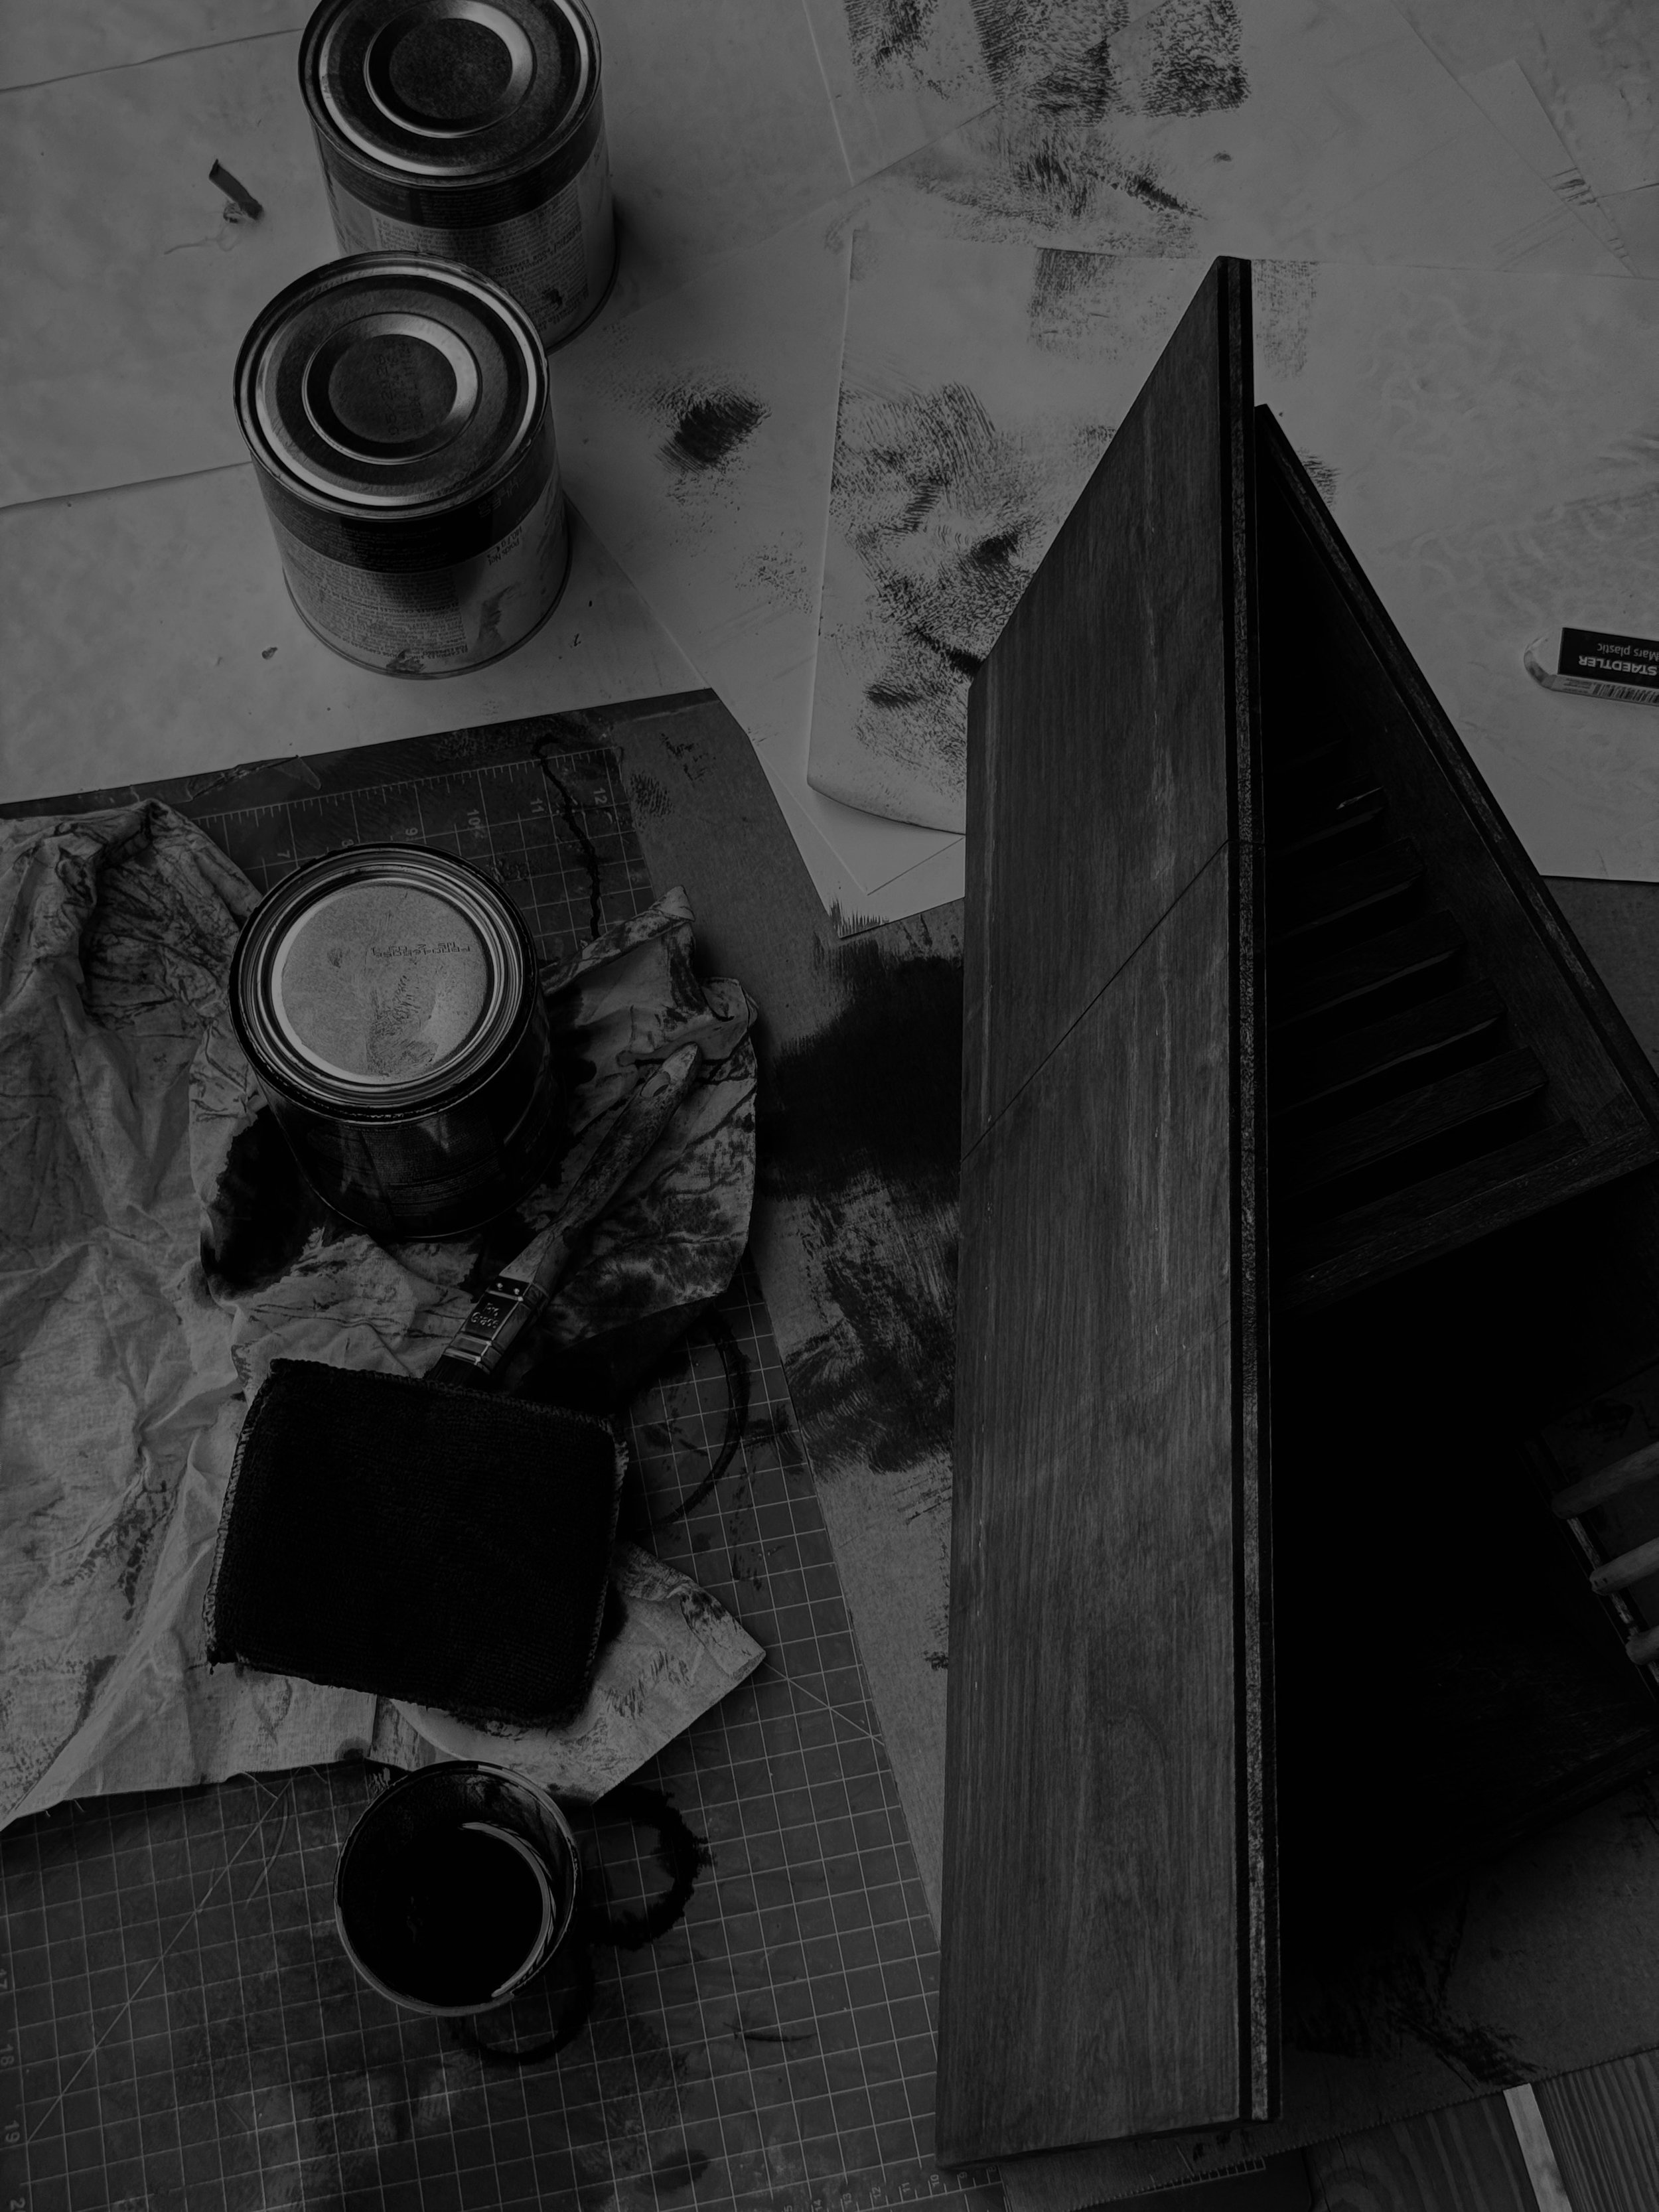
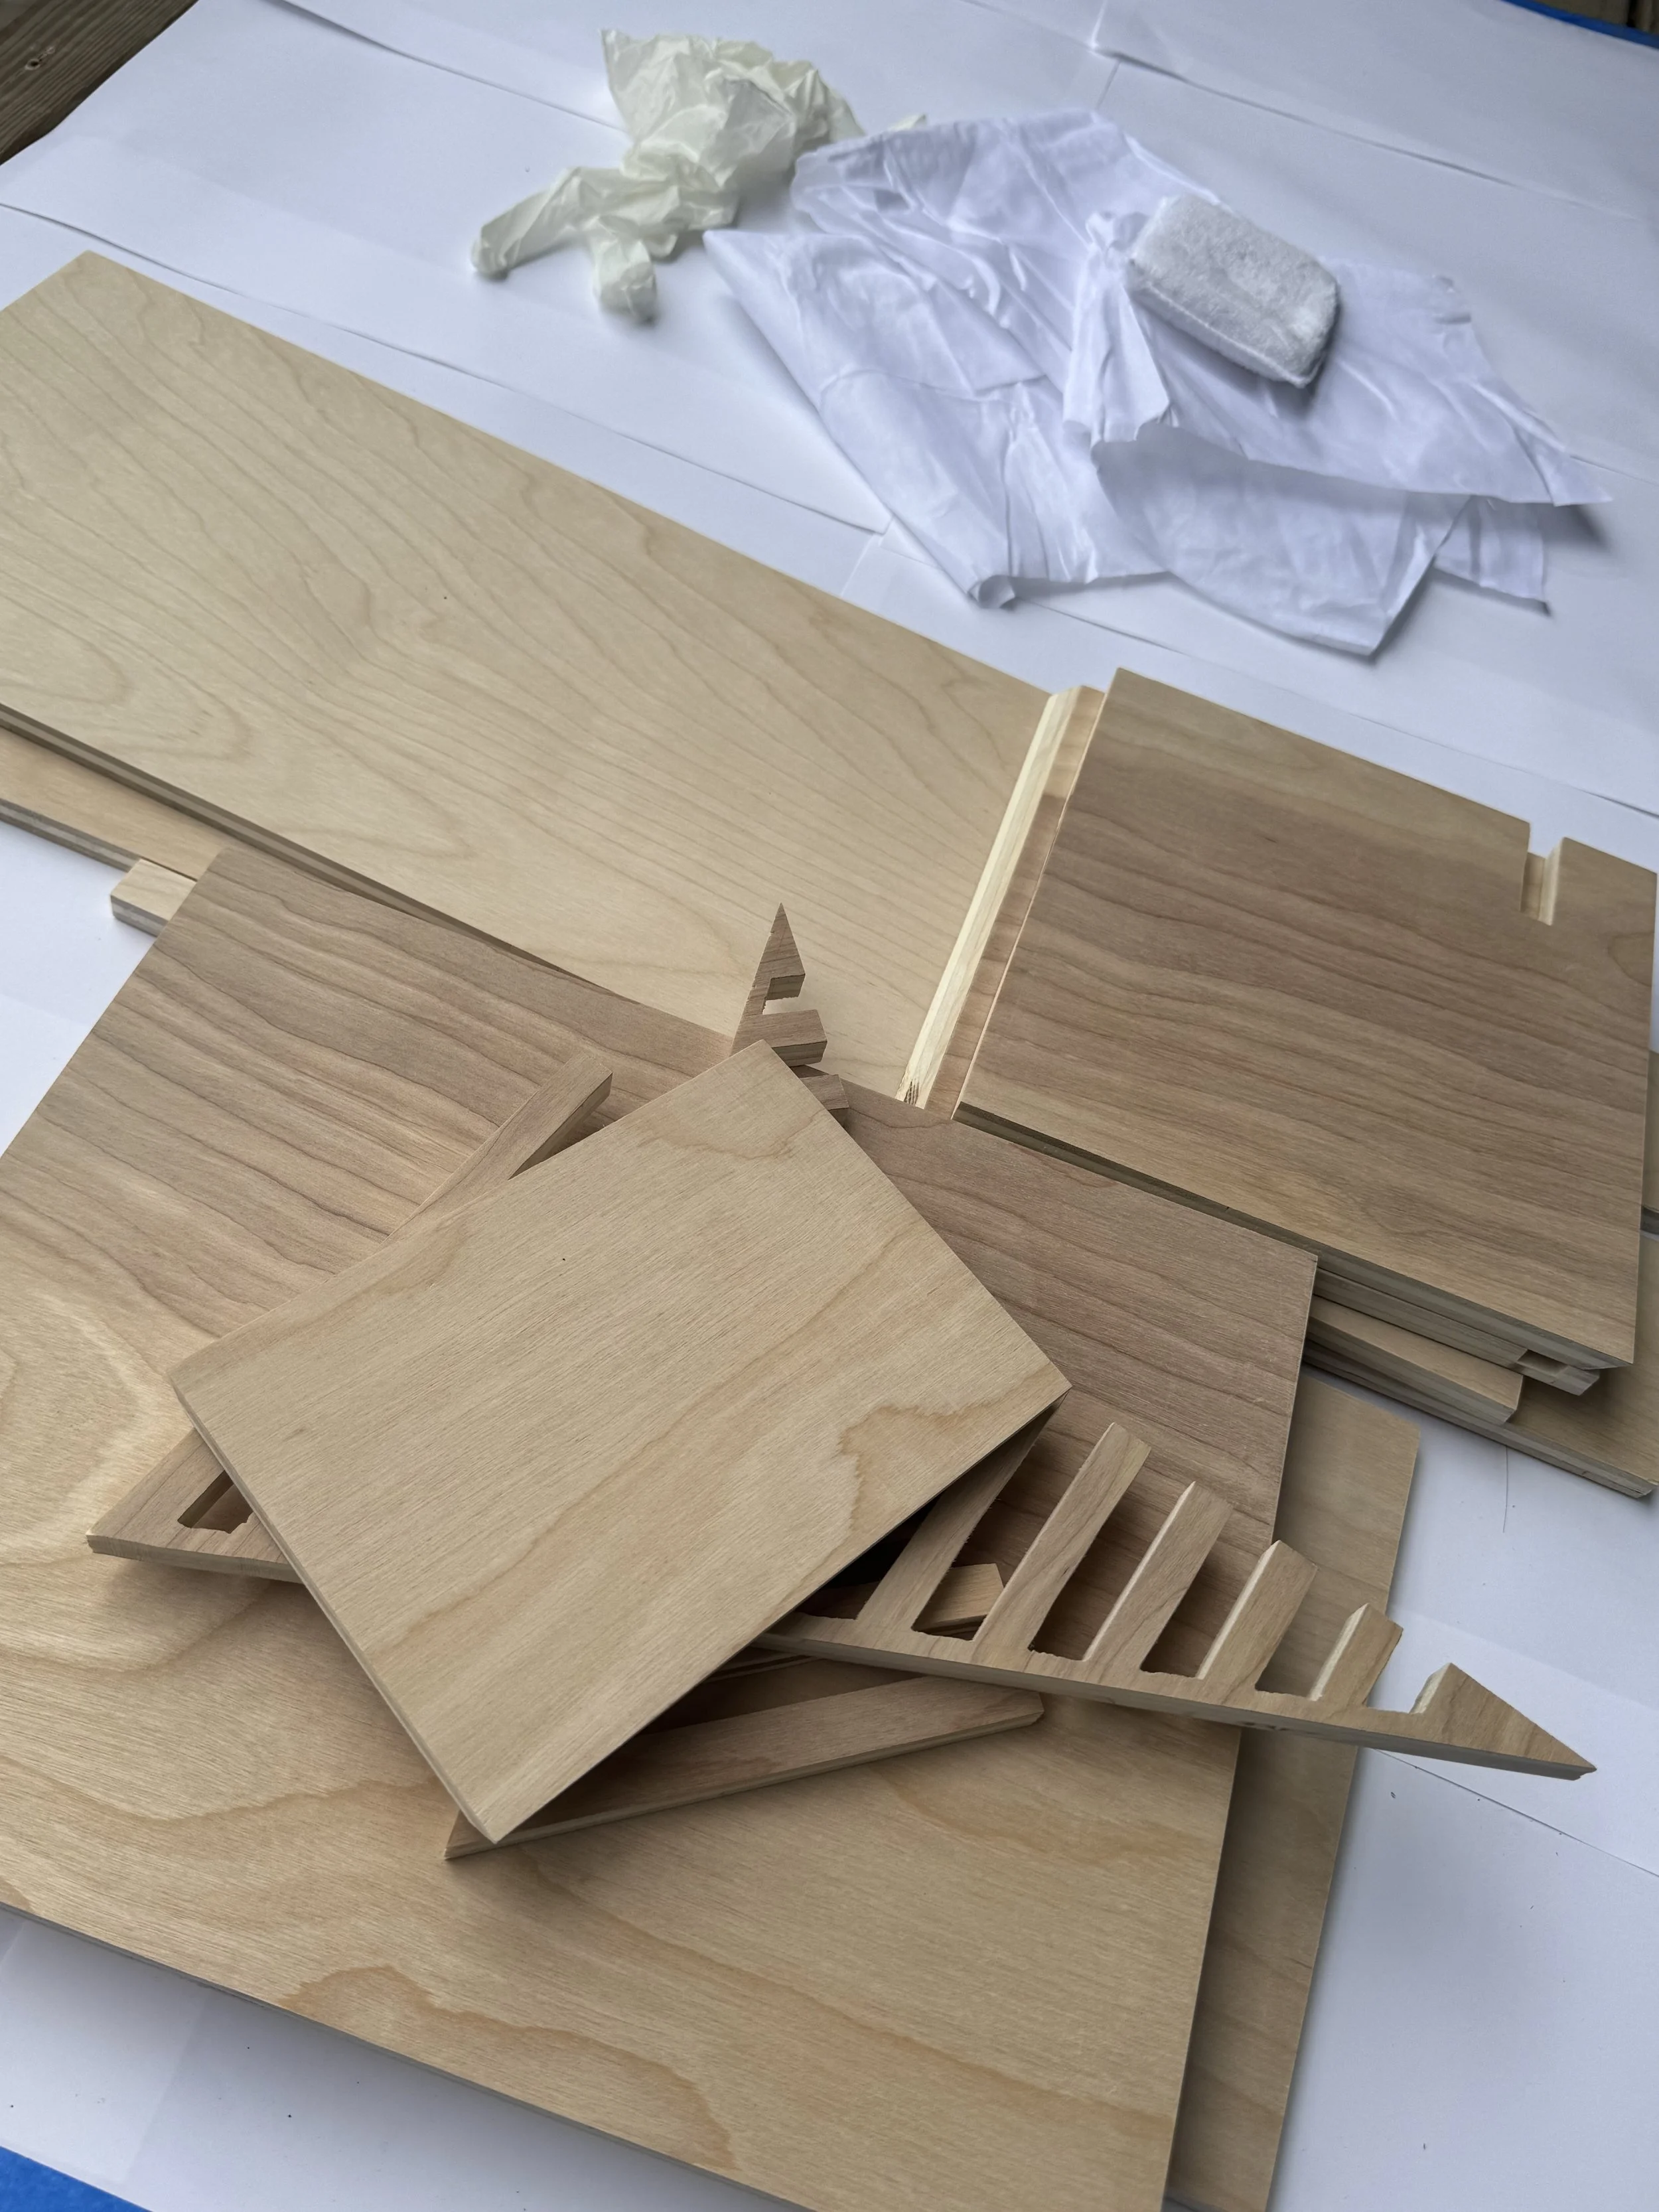
Before any finishing, all panels were sanded to smooth surfaces and edges. Both machine sanding and hand sanding were used to refine the texture and prepare the wood for even color application..


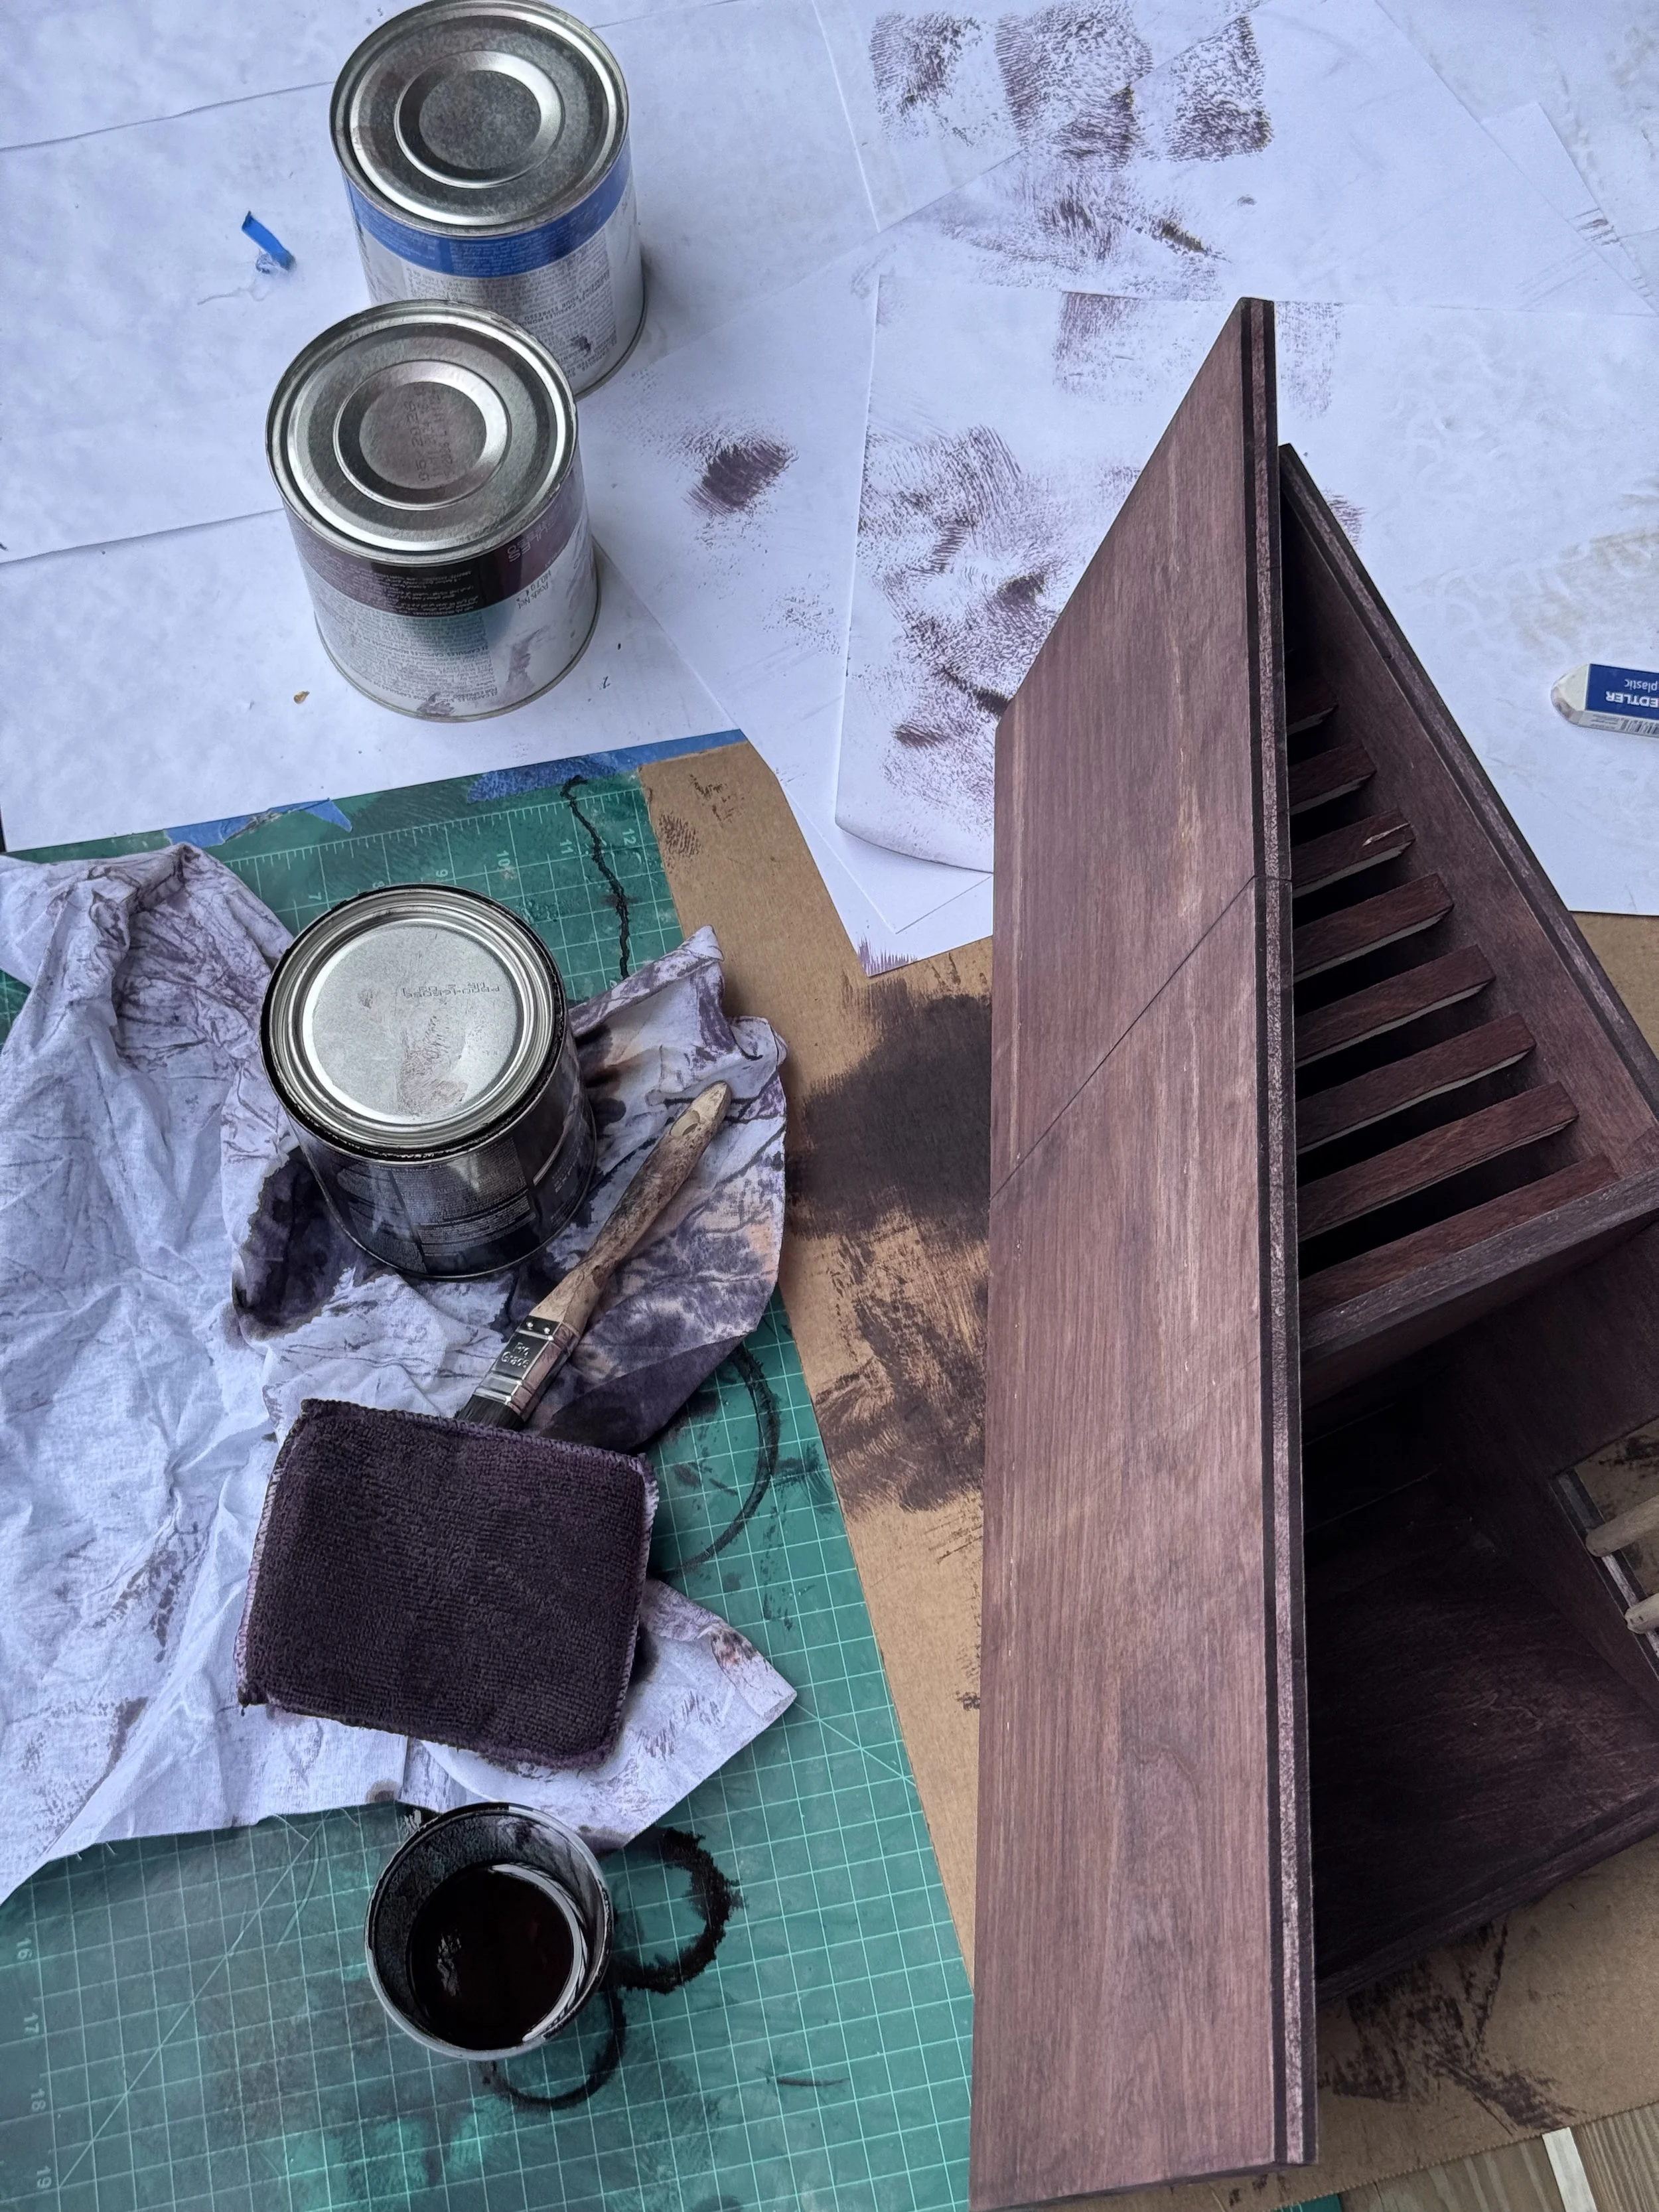

Coloring & stain
A base color was applied after sanding, followed by an additional coat after assembling the upper section to maintain a consistent overall tone.
After drying, panels were assembled with screws and hidden L-brackets, using the vertical panels as the main structural axis and carefully adjusting alignment and balance.


Assembly
Sanding